Author: BDS One base Media

  • Case Study: Using a Jetting Unit, CCTV Drainage Camera & Manhole Keys

    Case Study: Using a Jetting Unit, CCTV Drainage Camera & Manhole Keys

    If you’ve ever lived in London, you’ll know our drains have a mind of their own. One week everything is flowing beautifully, and the next week you’re wondering why your garden smells like something out of a horror film. This job was one of those situations. A customer called us about an overflowing outside manhole, and honestly, if you’ve ever walked past one of those when it’s backed up, you’ll know it’s not the sort of smell you forget.

    Thankfully, drain unblocking is what we’ve been doing since 2009, so we were more than ready for it.

    The Problem

    A Fully Charged Manhole With No Visible Entry or Exit Points

    When we arrived at the property in London, the first issue was obvious before anyone even spoke: the foul smell. The client mentioned that waste had started to creep out from the sides of the manhole, and that was understandably their biggest worry.

    What made this job tricky wasn’t just the blockage itself — it was the fact the chamber was completely full. You couldn’t see where the water was meant to come in or go out. Imagine trying to fix a drain while staring at a manhole full to the brim and thinking, “Right… where do we even start?”

    That’s where experience and the right tools make all the difference.

    Investigating the Blockage Using Drain Rods and CCTV

    Before we even thought about using the jetter, we needed to figure out where the system flowed. So the team started by using drain rods to gently probe the chamber. It’s always a bit like being a detective — you poke around, gather clues, and eventually the pipes reveal what’s going on.

    Following the direction of the rods, we located another manhole further along the line, and this one was empty. That confirmed the blockage was somewhere in the run between the two chambers.

    At this point, the specialised CCTV drainage camera came out. If you’ve never seen one in action, it’s surprising how much it helps. You can literally watch the blockage on-screen, see cracks, see fat deposits, wipes, roots — you name it. And in this case, the camera let us pinpoint exactly where the pipe was blocked.

    Clearing the Blockage Using a High-Pressure Jetting Unit

    Once we knew where the trouble was hiding, we brought out the jetting unit. High-pressure water jetting is one of those things people always imagine as dramatic — like blasting a fire hose down a hole — but the reality is much more controlled. It cuts through the blockage bit by bit until the flow starts returning.

    We continued jetting until the fully charged manhole finally began to drop. And once it started moving, it cleared beautifully. The whole system began to flush itself through again, which is always a satisfying sight, especially when the customer has been stressed about smells and overflowing waste.

    To be sure everything was properly cleared, we gave it another short burst with the jetter, just to tidy up the last bits.

    Double-Checking Everything With CCTV & Functional Tests

    A drain might look clear, but we never rely just on appearances. So, after jetting, we put the CCTV camera back in the pipework to check the condition of the line. No cracks, no remaining obstructions, no cause for concern. Exactly what we like to see.

    Next, we ran the indoor taps for a few minutes and flushed the toilets several times. Everything flowed perfectly.

    Only then did we put the manhole cover back on.

    Project Photos

    Client Feedback

    Relief, Short Notice Service & A Job Done Right

    The client was genuinely pleased — not just because the job was completed, but because we came out at short notice. They said they were impressed with how well the job was handled and that it was done “so well” considering the state the manhole was in.

    Honestly, comments like that really do make our day.

    Why This Job Mattered

    Aside from the unpleasant smells and the overflow, a fully blocked manhole can cause real damage to a property if left untreated. Wastewater can seep into foundations, cause damp, attract pests, and let’s be real — nobody wants that outside their back door.

    Having the right tools (jetting machine, CCTV camera, manhole keys) and a team that knows how to use them properly means the job gets done safely, cleanly and quickly.

    Another Successful Drain Unblocking Across London & The South East

    Since 2009, BDS Drainage has been helping homeowners and businesses across London with everything from blocked sinks and toilets to major drainage investigations. We’re highly rated on Google and Trustpilot for good reason — we show up, we solve the problem, we tidy up, and we don’t leave until everything is working the way it should.

    Need Help With a Blocked Drain?

    If you’ve got foul smells, overflowing chambers, slow sinks, or drains that just aren’t behaving, give us a call. We cover all of London and the South East — including Essex, Kent, Surrey and the surrounding areas.

  • Case Study: BDS Drainage restores flooded SW9 basement in record time

    Case Study: BDS Drainage restores flooded SW9 basement in record time

    Executive summary

    A property owner in SW9 9BE faced a flooding emergency in their basement, requiring urgent intervention to unblock a manhole, remove standing water, and thoroughly sanitise the space. BDS Drainage responded on the same day, deploying specialised equipment and cleaning protocols to restore the basement to a safe, usable condition. The client praised the engineers’ professionalism and the quality of work, highlighting the team’s ability to make the area “clean and safe.”

    Introduction

    BDS Drainage is a London-based emergency drainage company specialising in residential and commercial drainage services across London, Essex, Kent, and Surrey. With a reputation built on rapid response times, professional service, and state-of-the-art equipment, BDS Drainage has become a trusted partner for property owners facing drainage emergencies. Operating 24/7 with a commitment to arrive within 90 minutes of receiving a call, the company handles everything from blocked drains and toilets to basement flooding and CCTV drain surveys.

    The problem

    When the property owner in SW9 discovered their basement had flooded, they faced multiple urgent concerns that extended beyond simple water removal. The flooding had created standing water throughout the space, posing immediate health and safety risks. A blocked manhole was preventing proper drainage, compounding the problem and threatening to cause further water accumulation.

    The client’s primary concerns centered on three critical issues:

    Lingering water damage: The extent of the flooding meant that simply removing visible water wouldn’t be sufficient. Without proper extraction and cleaning, moisture could seep into walls, floors, and structural elements, potentially causing long-term damage.

    Health hazards: Standing water in basements can quickly become a breeding ground for bacteria, mold, and other contaminants. The client needed assurance that the space would be thoroughly sanitised to eliminate any health risks.

    Usability and safety: The basement needed to be restored to a fully functional, safe space. This required not only clearing the water but also ensuring all drainage systems were operational and the area was properly cleaned.

    The urgency of the situation demanded a drainage company capable of responding quickly with the right equipment and expertise to handle all aspects of the job—from unblocking to deep cleaning.

    The solution

    BDS Drainage’s team arrived promptly to assess the situation and implement a comprehensive restoration plan. Their approach combined specialised equipment with systematic cleaning protocols to address every aspect of the flooding emergency.

    Phase 1: Water extraction
    The engineers deployed a professional vac machine to extract all excess water from the basement. This industrial-grade equipment ensured thorough removal of standing water, including water that had seeped into corners and low-lying areas.

    Phase 2: Drain clearance
    To address the root cause of the flooding, the team used a high-pressure jet washer (HPJW) to clear the blocked manhole and drainage system. This powerful equipment effectively removed blockages and ensured water could flow freely through the drainage network, preventing future flooding incidents.

    Phase 3: Deep cleaning and sanitisation
    Following water extraction and drain clearance, the team conducted a thorough deep clean of the entire basement floor and affected areas. Specialised cleaning chemicals were applied to sanitise all surfaces, eliminating bacteria, odors, and potential health hazards. This critical step ensured the basement was not only dry but also hygienically safe for use.

    Phase 4: System verification
    Before completing the job, BDS Drainage verified that all drains were unblocked and functioning properly, with water flowing freely through the system. The team ensured the property was left in full working order, giving the client peace of mind that the problem had been completely resolved.

    Results

    The project achieved all objectives within a same-day response timeframe, demonstrating BDS Drainage’s efficiency and commitment to emergency service. The basement was successfully restored to a clean, safe, and fully functional condition.

    Key Outcomes:

    Same-day completion: Despite the complexity of the job, the entire restoration was completed on the day of the call-out, minimising disruption to the property owner.

    Budget adherence: The project stayed within the agreed budget, with no hidden costs or unexpected charges.

    Enhanced safety and hygiene: The comprehensive sanitisation process eliminated health risks and ensured the basement met high standards of cleanliness.

    Fully operational drainage: All drainage systems were cleared, tested, and confirmed to be working properly, preventing future flooding issues.

    The client’s testimonial captured their satisfaction with the service: “Extremely happy with the engineers’ professionalism, for making the area clean and safe.” This positive feedback reflects BDS Drainage’s core commitment to customer satisfaction and professional service delivery.

    Work Showcase

    Conclusion

    This case study demonstrates BDS Drainage’s capability to handle complex flooding emergencies with speed, professionalism, and thoroughness. By combining rapid response times with specialised equipment and systematic cleaning protocols, the company delivered a solution that addressed both immediate concerns and long-term safety.

    For the property owner in SW9, what began as a stressful emergency ended with a fully restored, safe basement and the confidence that comes from working with experienced drainage professionals. As BDS Drainage continues to serve London and the South East with 24/7 emergency services, this project exemplifies the company’s dedication to achieving 100% customer satisfaction on every job.

    Facing a drainage emergency or need professional drainage services?

    Contact BDS Drainage today for a rapid response and expert solution. With no call-out charges, a 100-day guarantee on all work, and engineers who arrive within 90 minutes, we’re ready to help restore your property to full working order.

  • Case Study: BDS Drainage restores pipework for Kent property owner

    Case Study: BDS Drainage restores pipework for Kent property owner

    BDS Drainage provided a swift and professional excavation and pipe replacement service for a property owner in Kent, ensuring the drainage system was fully restored with minimal disruption. The client praised the team’s efficiency, professionalism, and the excellent condition of the site upon completion.

    Introduction

    BDS Drainage is a leading expert in residential and commercial drainage services, operating across London, Essex, Kent, and Surrey. Known for their 24-hour emergency response and commitment to high standards, they handle everything from blocked drains to complex excavation and repair projects. This case study highlights their work with a property owner in Kent who required urgent attention to damaged underground pipework.

    The problem

    A property owner in the Tn12 6FH area discovered significant damage to their underground drainage pipes, requiring immediate and expert intervention. The primary challenge was the complexity of the excavation work needed to access and replace the damaged sections without causing further disruption to the property. The client’s main concerns were the unknown extent of the damage, the speed at which the repairs could be completed, and ensuring the site would be left clean, safe, and fully restored after the project was finished. A swift, tidy, and effective solution was paramount.

    The solution

    The BDS Drainage team was tasked with the excavation project. Leveraging their expertise, they began by carefully digging down to the affected area to expose the damaged pipework. The team systematically removed the broken sections and replaced them with new, durable materials designed for long-term reliability.

    Throughout the process, the engineers employed professional excavation techniques to ensure the safety and integrity of the surrounding area. A key part of the solution was the meticulous backfilling and “making good” of the excavated site. Special attention was given to restoring the ground to its original condition, directly addressing the client’s concern about the property’s post-project state. The team concluded the job by thoroughly cleaning the site, removing all debris and ensuring the area was left spotless.

    Result

    The project was a complete success, resulting in a fully restored and reliable drainage system. BDS Drainage completed the work in a timely manner and within the agreed budget, meeting all of the client’s initial requirements.

    The client was highly satisfied with the outcome, providing a positive testimonial:
    “The client was happy with the extent of work carried out by the engineers on site, and how quickly and professionally it was carried out.”

    The key results included:

    • Improved drainage reliability: The new pipework ensures the system functions efficiently, preventing future issues.
    • Timely completion: The project was finished promptly, minimising inconvenience for the property owner.
    • Budget adherence: The work was completed within the agreed-upon budget.
    • High client satisfaction: The client provided excellent feedback, highlighting the team’s professionalism and the quality of their work.

    Conclusion

    This project demonstrates BDS Drainage’s ability to handle complex excavation and repair works with efficiency, professionalism, and a strong focus on client satisfaction. By addressing the client’s concerns about speed, quality, and cleanliness, the team delivered a seamless solution that restored the property’s drainage system to perfect working order.

    BDS Drainage continues to build on its reputation as a trusted partner for all drainage needs, committed to providing high-quality, guaranteed work. The successful outcome of this project reinforces their position as a leading drainage specialist in the South East.

    If you are experiencing drainage issues or require expert advice, explore our services or request a free quote today.

  • Shower Tray Crack Repair Guide

    Shower Tray Crack Repair Guide

    Spotting a crack in your shower tray during your morning rinse is one of those special moments, isn’t it? Right up there with finding out your boiler has given up the ghost mid-winter. But before you start frantically googling “emergency plumber near me” and contemplating a second mortgage, take a deep breath. Most shower tray cracks are surprisingly manageable, and with a bit of DIY know-how, you can perform a shower tray crack repair without breaking the bank.

    Here at BDS Drainage, we’ve seen it all—from tiny hairline cracks that whisper of future problems to gaping chasms that turn your bathroom into an impromptu paddling pool. The good news? With the right tools and a little patience, you can often fix the problem yourself.

    This guide will walk you through everything you need to know to fix a crack in a shower tray, from assessing the damage to achieving a finish so smooth you’ll forget the crack was ever there. We’ll also share a few insider tips from our years in the drainage business because, let’s be honest, the devil is in the details.

    Identifying the type of crack

    cracked shower tray

    Before you roll up your sleeves and get stuck in, you need to understand what you’re dealing with. Not all cracks are created equal, and a misdiagnosis could lead to more trouble down the line. Give your shower tray a good scrub to get a clear view of the damage.

    Hairline cracks

    These are the thin, spidery lines that often appear on the surface. They’re usually cosmetic, caused by minor impacts or the tray expanding and contracting with temperature changes. Hairline cracks are the perfect candidates for a DIY fix and respond well to a standard repair kit.

    Chips

    Small but mighty annoying, chips are usually caused by something being dropped in the shower. Like hairline cracks, these can be patched up fairly easily with the right materials, restoring your shower tray’s smooth surface.

    Larger cracks or multiple cracks

    If you’re looking at a crack that’s more of a chasm, or several cracks have appeared at once, this could signal a structural issue. Does the shower tray feel a bit like a trampoline when you step on it? If so, it’s likely not supported properly underneath. This is a more serious problem that a simple filling job won’t fix.

    DIY cracked shower tray repair: a step-by-step guide

    shower tray repair guide

    Ready to tackle that crack? Here’s your step-by-step guide to repairing a cracked shower tray with professional-looking results.

    Step 1: Gather your materials

    A successful repair begins with having all your tools at hand. There’s nothing worse than being halfway through a job and realising you’re missing a crucial piece of kit. You’ll need:

    • A shower tray repair kit: You can find these at most DIY stores. An epoxy resin-based kit is usually a safe bet.
    • Sandpaper: Fine-grit sandpaper (around 120-240 grit) will do the trick.
    • Cleaning supplies: A good cleaner, a sponge, and some clean, dry cloths.
    • Safety gear: Protective gloves and eye protection are non-negotiable.

    Step 2: Prepare the surface

    This is the part many people rush, but proper preparation is the key to a lasting repair. Start by giving the cracked area and its surroundings a thorough clean to remove any soap scum, grease, or dirt. Once it’s clean, make sure the area is completely dry.

    Next, lightly sand the surface around the crack. You’re not trying to grind it down, just roughing it up a bit. This creates a better surface for the repair compound to grip onto, ensuring a strong bond. Wipe away any dust with a clean cloth.

    Step 3: Mix and apply the epoxy

    Now for the time-sensitive part. Most epoxy repair kits have a limited working time once the components are mixed, so read the instructions carefully before you begin.

    Mix only as much of the epoxy as you think you’ll need. It’s better to mix a second small batch later than waste a large one. Using a putty knife, apply the mixture to the crack, working it in to ensure it’s completely filled. You’ll want to build it up so it sits slightly proud of the shower tray’s surface. Don’t stress about making it perfectly smooth just yet; that comes later.

    Step 4: Cure and finish

    Patience is a virtue, especially when it comes to letting the repair cure. While most compounds need a few hours, leaving it to cure overnight will give you the best and strongest result.

    Once it’s fully hardened, it’s time to get that smooth finish. Using your sandpaper, start sanding the repaired area. Begin with a coarser grit to level the epoxy with the rest of the tray, then switch to a finer grit to smooth it out until it blends seamlessly. A final polish will have it looking good as new.

    When to call a professional to repair cracked shower tray

    bds drainage van

    While a bit of DIY can be satisfying, some jobs are best left to the experts. You should consider calling a professional if:

    • The crack is near the waste outlet: This is a high-stress area, and a failed repair could lead to significant leaks.
    • There are multiple, interconnected cracks: This is a strong indicator of an underlying structural problem.
    • The shower tray feels unstable or spongy: Simply filling the cracks won’t solve the problem if the tray isn’t properly supported.
    • You can see signs of water damage: If you notice damp patches on the ceiling below or on the surrounding floor, it’s time to get professional help.

    Ignoring these signs can turn a small repair job into a major, expensive renovation. At BDS Drainage, our team can assess the situation, tackle any drain maintenance, and provide a lasting solution.


    Frequently asked questions


    How long does a DIY shower tray repair last?

    If done correctly with quality materials, a DIY repair can last for several years. The key is addressing the root cause of the crack, not just the symptom.

    What are the common causes of a cracked shower tray?

    Cracked shower trays can result from a variety of issues. One of the most common causes is improper installation, where the tray is not supported evenly, leading to stress and eventual cracking over time. Another common cause is the use of low-quality materials that are prone to wear and tear.

    Heavy impacts, such as dropping a heavy object on the tray, can also cause immediate damage. Additionally, prolonged exposure to extreme temperatures or fluctuating humidity levels can weaken the material, making it more susceptible to cracks. Regular maintenance and ensuring proper installation can help prevent these issues.

    Can I repair all types of shower trays?

    Most acrylic and resin shower trays are repairable with standard kits. However, stone resin or ceramic trays might require specialised products or professional attention. Always check that your repair kit is suitable for your tray’s material.

    Is it safe to use the shower right after the repair?

    Definitely not. You should wait at least 24 hours for the repair to fully cure. Using the shower too soon can weaken the bond and cause the repair to fail.

    What if the crack comes back?

    A recurring crack is a classic sign that the underlying issue wasn’t resolved. This usually means the tray needs better support or, in some cases, may need to be replaced.

    Can I use the same techniques and methods for repairing a crack in my bathroom sink?

    While repairing a cracked tray might seem similar to fixing a bathroom sink, don’t confuse the two. Sinks are often made of porcelain, ceramic, or cast iron, requiring a different repair process and specific repair material kits like porcelain compounds for small cracks. For any repair, always clean and thoroughly dry the damaged area to ensure proper adhesion. Follow the manufacturer’s instructions carefully. If the damage is extensive, or you’re uncertain about the process, it’s wise to consult a professional.


    Don’t let a small crack become a big problem

    Repairing a cracked shower tray doesn’t have to be a daunting task. By acting quickly and following a careful process, you can achieve a professional-quality fix that will save you from costly water damage and replacement fees down the line.

    However, know when to call in the cavalry. If you’re faced with extensive damage or you suspect a structural issue, seeking professional advice is the smartest move. The team at BDS Drainage has handled countless drainage challenges, from simple fixes for blocked drains to complex installations.

    If your DIY project feels a bit out of your depth, or if you want an expert opinion on your drainage issues, don’t hesitate to get in touch. Contact BDS Drainage today for a free quote and expert advice to keep your bathroom in top shape.

  • CCTV Drain Survey When Buying a House – is it worth it?

    CCTV Drain Survey When Buying a House – is it worth it?

    Buying a house is one of the biggest investments you’ll make in your lifetime, and alongside the excitement comes the necessary due diligence. You’ll likely get a structural survey, check for damp, and do all the other standard house-buying checks. But, have you considered what’s lurking beneath the surface? That’s where a CCTV drain survey comes in.

    A CCTV drain survey provides a detailed inspection of your potential property’s drainage system, using state-of-the-art camera technology. A pre-purchase survey is an often-overlooked check, but it can uncover hidden issues that could cost you thousands down the line.

    If you’re wondering whether a home buyer’s drain survey is worth the cost, we’ll break it all down for you here.

    The pros and cons of a CCTV drainage survey

    The advantages

    Opting for a CCTV drain survey comes with several benefits, especially as you’re about to make such a significant financial commitment.

    • Complete drain health check: A CCTV drain survey provides a detailed inspection of the property’s drainage system, identifying any existing or potential issues.
    • Saves you money long-term: Addressing drainage concerns before they turn disastrous can prevent expensive future repairs.
    • Negotiation power: If the survey highlights severe drainage problems, you may be able to renegotiate the asking price or request the seller to fix them.
    • Peace of mind: Knowing the drainage system is in sound condition will save you from nasty surprises once you’re moved in.

    The disadvantages

    While beneficial, CCTV drain surveys are an extra expense. On average, costs range from £100-£400 depending on the property. However, if it prevents future repair bills running into the thousands, the survey more than pays for itself.

    What problems can a CCTV drain inspection identify?

    cctv drain inspection when buying house

    Despite being out of sight, problems in drainage systems can result in substantial inconvenience and high costs. Here are some key issues that a CCTV drain inspection can detect:

    1. Cracks and fractures in your drainage system

    Over time, drains can develop cracks or fractures due to pressure, age, or shifting ground. If left untreated, these can escalate into full collapses, leading to costly repair work.

    2. Root intrusions

    Mature trees near a property are a lovely aesthetic, but their roots can infiltrate underground pipes, causing blockages or worse, breaks.

    3. Blockages or debris build-up

    Your future dream home might be sitting on a drainage system clogged with grease, silt, or even construction debris. A CCTV survey will detect a blocked drain before it causes major issues.

    4. Misalignment and leaks

    Pipe joints can shift or become misaligned over time, causing leaks and water wastage. CCTV cameras can locate these faults with amazing precision.

    Is the cost worth the benefit?

    Imagine spending £300 on a CCTV drain survey only to find that everything is perfectly fine. It may seem like a wasted expense at first. But now imagine skipping the survey and, six months down the line, finding yourself with a collapsed drain that costs £3,000 to repair. Which situation would you rather be in?

    For properties with older drainage systems or ones surrounded by large trees, a CCTV drain survey provides invaluable insight. Even with newer homes, unexpected problems can arise, especially if the builder hasn’t adhered to best practices. Spending a small amount upfront can save you significant amounts of time, money, and stress further down the road.

    When should you consider a CCTV drain survey?

    cctv drain survey when buying house

    Not all properties require a CCTV drain survey as standard. However, it’s highly recommended in the following circumstances:

    • Older properties: Older homes are more likely to have corroded or worn-out drains that have never been checked.
    • Mature trees around the property: The roots of larger trees can wreak havoc on underground pipes over time.
    • Signs of existing issues: If the property has slow drainage, damp patches, unpleasant odours, or standing water outside, a drain survey is a must.


    FAQ

    What does a CCTV drain survey involve?

    A CCTV drain survey uses a small, high-tech camera that’s inserted into your drains. It provides real-time footage of your drainage system, allowing engineers to identify any faults or problem areas.

    How long does a CCTV drain survey take?

    On average, a thorough drain survey takes around 1-2 hours. However, this can vary depending on the size of the property and the complexity of the drainage system.

    How much does a CCTV drain survey cost?

    The typical cost ranges from £100 to £400 depending on the property’s location and system size. At BDS Drainage, we offer competitive pricing – get in touch for a personalised quote.

    Is a CCTV drain survey a legal requirement?

    No, it’s not legally required when purchasing a home. However, it’s highly recommended to identify any hidden drainage issues before committing to a property.

    Can a CCTV drain survey identify all drain issues?

    While a CCTV survey is exceptionally comprehensive, there may be rare cases where further investigation is needed (e.g., for structural issues outside the camera’s line of sight).

    Can a CCTV drain survey be used for drain mapping?

    Yes, a CCTV drain survey is an excellent tool for drain mapping. It provides a detailed and accurate representation of the drainage system, including identifying the layout, pipe connections, and any hidden sections. This information is particularly useful for planning renovations, repairs, or extensions, ensuring that no existing drainage pathways are disrupted.


    Protect your investment today

    Your dream home deserves to be free of hidden surprises. A CCTV drain survey might seem like a minor consideration, but it could save you thousands and plenty of headaches later. Whether you’re purchasing an older home, spotting troubling signs, or just want peace of mind, investing in a professional CCTV drain survey is the smart move.

    Contact BDS Drainage for a free tailored quote and see how our expert team can help ensure your next home is a solid investment. Don’t risk it – check it!

    Why choose BDS Drainage for your pre-purchase drain survey?

    At BDS Drainage, we’ve been helping homeowners and buyers protect their investments for years, offering expert CCTV drain surveys throughout London, Essex, Kent, and Surrey. Here’s why choosing us is a no-brainer:

    Expert advice and professionalism you can rely on

    Our professionals use state-of-the-art camera equipment to give you the clearest insight into the condition of your drains.

    Detailed report

    After completing your CCTV survey, we’ll present you with a detailed survey report that outlines all of our findings with a suggested course of action. We’ll even give you a free quote for any necessary remedial work which we are often able to complete immediately after giving your your detailed drainage report.

    24-hour availability

    Need drainage support urgently? We’re here whenever you need us.

    Written guarantee

    All our work comes with a solid guarantee, giving you complete peace of mind.

    Competitive local rates

    Fantastic service doesn’t have to cost the Earth.

    Start your house purchase with confidence. Request your free quote for a CCTV drain survey today and experience our unrivalled service.


  • How to Get Rid of Drain Flies

    How to Get Rid of Drain Flies

    Uninvited guests buzzing around your bathroom sink? Those tiny helicopter-like insects doing aerial acrobatics near your drains aren’t just annoying—they’re drain flies, and they’ve made themselves quite comfortable in your pipes.

    Don’t panic! While these pesky drain flies might seem determined to overstay their welcome, getting rid of drain flies is entirely achievable with the right approach. These small but mighty nuisances can multiply faster than you can say “pest control,” but armed with some household essentials and a bit of know-how, you’ll have them evicted in no time.

    Whether you’re dealing with a few stragglers or what feels like a full-scale invasion, this guide will walk you through everything you need to know about eliminating drain flies and preventing their return. From simple DIY solutions to knowing when it’s time to call in the professionals at BDS Drainage, we’ve got your back.

    What are drain flies?

    Drain flies, also known as moth flies, filter flies, sewer flies or sink flies, are those tiny grey or brown insects you’ve spotted hovering around your drains. Despite their name suggesting graceful flight, these creatures are more like tiny helicopters—they hop and flutter from surface to surface rather than soar.

    At just one-sixth of an inch long, drain flies might be small, but they pack a punch when it comes to reproduction. A single female can lay up to 200 eggs at once, with new recruits emerging from drain fly larvae every 48 hours. That explains why what started as “just one or two” quickly becomes a small squadron.

    These moisture-loving insects are drawn to the warm, humid environment inside your drains, where they feast on the organic matter that naturally accumulates in pipes. Hair, soap scum, food particles, and other debris create the perfect breeding ground for drain flies to set up shop and start their families.

    Identifying a drain fly infestation

    drain flies

    Spotting drain flies is usually straightforward—they’re the small, dark insects congregating around your bathroom or kitchen sinks. However, if you want to confirm the extent of your drain fly problem, try this simple overnight test as your first step in the pursuit of getting rid of drain flies once and for all.

    The tape test

    Before bed, place strips of clear tape (sticky side down) over the drains where you’ve noticed activity. Check the tape in the morning—any drain flies attempting to escape will be trapped on the adhesive surface. This method gives you a clear picture of which drains are affected and how serious the infestation is.

    Other telltale signs include:

    • Small, moth-like insects near sinks, showers, or floor drains
    • Flies that seem to “hop” rather than fly smoothly
    • Increased activity after periods of non-use (like returning from holiday)
    • A musty odour emanating from drains

    DIY methods to get rid of drain flies

    The good news? Most drain fly problems can be resolved within a week using simple household ingredients and consistent cleaning.

    Here are five proven methods to kill drain flies:

    Clean the sink and drain thoroughly

    Start with a thorough cleaning of your sink and drain using your regular cleaning solution. Use a pipe brush to scrub around and inside the drain opening, removing any visible buildup of hair, soap, and debris that might be providing food for the flies.

    Boiling water treatment

    One of the simplest solutions is also one of the most effective. Boil a medium-sized pot of water and carefully pour it down the affected drain. The hot water helps dissolve organic buildup and can eliminate eggs and larvae. This is not just a great way to eliminate drain flies quickly, but repeating this process once or twice weekly serves as a preventive measure.

    Baking soda, salt, and vinegar solution

    For a more thorough cleaning, combine half a cup of salt with half a cup of baking soda and one cup of white vinegar. Pour this mixture down the drain and leave it overnight to work its magic. The combination creates a foaming action that helps break down organic matter. In the morning, flush the drain with boiling water to wash away the loosened debris.

    Apple cider vinegar trap

    If adult drain flies are still buzzing about after cleaning the drains, create a simple trap using apple cider vinegar. Fill a small dish with the vinegar and cover it tightly with plastic wrap. Poke several small holes in the plastic—large enough for flies to enter but difficult for them to escape. The vinegar’s sweet scent attracts the flies, while the plastic wrap traps them inside.

    Eco-friendly drain cleaners

    For persistent infestations, consider using an eco-friendly commercial drain cleaner. These products are specifically designed to break down organic matter without harsh chemicals that might damage your pipes or harm the environment. Follow the manufacturer’s instructions carefully and always flush with plenty of water afterwards.

    When to call a professional

    Sometimes, despite your best DIY efforts, drain flies persist. This usually indicates a deeper issue within your drainage system that requires professional attention.

    Signs you need professional help

    Consider calling BDS Drainage if:

    • DIY methods haven’t resolved the problem after two weeks
    • Flies keep returning despite regular cleaning
    • Multiple drains throughout your home are affected
    • You notice unusual odours or slow drainage
    • The infestation seems to worsen rather than improve

    CCTV drain surveys for infestations

    When drain fly problems persist, the issue might lie deeper within your drainage system. BDS Drainage offers comprehensive CCTV drain surveys that can identify hidden problems contributing to infestations. Using state-of-the-art camera equipment, our experts can locate blockages, damage, or areas where organic matter is accumulating beyond your reach.

    These surveys provide a clear picture of your drain’s condition and help determine the most effective treatment approach, ensuring the problem is resolved permanently rather than temporarily masked.

    Preventing drain flies from returning

    Prevention is always better than cure, and keeping drain flies away requires consistent maintenance and attention to your drainage system.

    Regular drain maintenance

    Establish a weekly routine of flushing drains with boiling water to prevent organic buildup. Monthly deep cleaning with the baking soda and vinegar solution helps maintain clean pipes and eliminates potential breeding sites. Check our blog for more details on drainage maintenance.

    Address underlying drainage issues

    Poor drainage creates the perfect environment for drain flies to thrive. If you notice slow-draining sinks, gurgling sounds, or persistent odours, these could indicate underlying issues that need professional attention. Regular maintenance by drainage experts can identify and resolve problems before they become breeding grounds for pests.

    Keep drains dry when possible

    After using sinks or showers, wipe down surfaces to remove excess moisture. Fix leaky taps promptly, as even small drips can create the humid conditions drain flies love.

    Take back control of your drains

    Drain flies might be persistent, but they’re certainly not invincible. With the right combination of cleaning, prevention, and professional support when needed, you can eliminate these pesky visitors and keep them from returning.

    Remember, successful drain fly elimination isn’t just about getting rid of the flies you can see—it’s about addressing the underlying conditions that attracted them in the first place. Regular maintenance, prompt attention to drainage issues, and professional intervention when necessary will keep your home drain fly-free.


    Frequently asked questions

    Are drain flies harmful?

    Drain flies themselves don’t bite or sting humans, but they can indicate unsanitary conditions in your drains. According to research by Ohio State University Extension, inhaling dust from dead drain flies may potentially cause respiratory issues in sensitive individuals. More importantly, their presence suggests your drains could benefit from a thorough cleaning.

    How quickly do drain flies reproduce?

    Drain flies have a remarkably fast reproduction cycle. Females can lay up to 200 eggs at once, and new flies can emerge as quickly as every 48 hours under ideal conditions. This rapid reproduction explains why small problems can quickly escalate into major infestations.

    Can drain flies live in toilets?

    Yes, drain flies can inhabit toilet drains, particularly in toilets that aren’t used frequently. They’re attracted to the organic matter that can accumulate in the toilet’s trap and drain pipes. Regular cleaning and flushing can prevent toilet-based infestations.


    Ready to reclaim your drains?

    If you’re dealing with persistent drain fly problems or suspect deeper drainage issues, don’t hesitate to contact BDS Drainage.

    Our expert team serves London, Essex, Kent, and Surrey with emergency response capabilities, written guarantees, and 24-hour service. We’re professional, experienced, and offer competitive local rates to ensure your drainage problems are resolved quickly and permanently.

    Contact BDS Drainage today for expert solutions that work.

  • Is Your Household Drainage System Connected Properly?

    Is Your Household Drainage System Connected Properly?

    While you might think checking your drain connections sounds about as exciting as watching paint dry, trust us — getting this wrong could leave you with more than just a hefty bill. It could make you an accidental environmental villain.

    Every household drainage system tells a story. Sometimes it’s a tale of proper planning and professional installation. Other times, it reads more like a comedy of errors involving well-meaning DIY enthusiasts and unfortunate “shortcuts.” The truth is, many homeowners have no idea whether their drains are connected correctly, and that’s where the trouble begins.

    This guide will help you understand your household drainage system, spot potential problems, and know when to call in the professionals. By the end, you’ll be able to confidently assess whether your home is doing its bit for the environment or accidentally contributing to water pollution. Let’s dive in (pun intended).

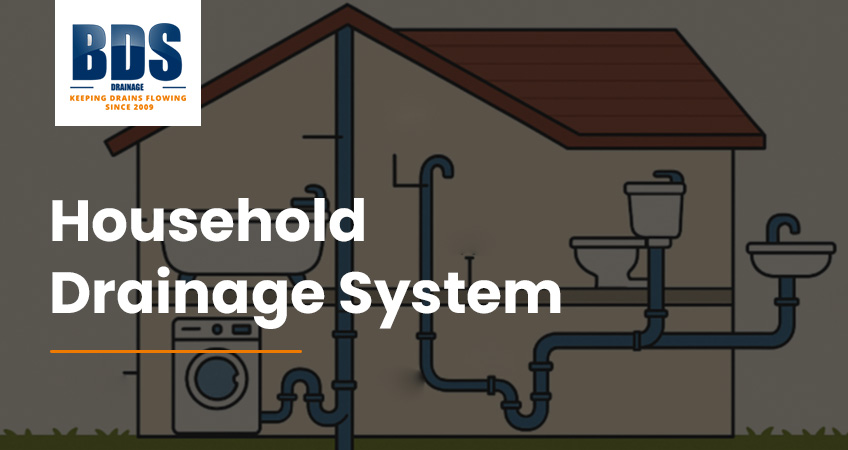
    Understanding your household water drainage system

    household water drainage system

    Your household drainage system is like the circulatory system of your home — it needs to flow in the right direction to keep everything healthy. Most modern homes have two separate drainage networks that serve very different purposes.

    Surface water drains

    Think of your drainage system as having two distinct jobs. The first handles rainwater drainage, collecting water from your roof, gutters, driveways, and any other surfaces where rain lands. This water is relatively clean — it’s just H2O that’s taken a detour via your tiles.

    Wastewater drains

    The second system manages wastewater (also called “foul water”), which includes everything that goes down your sinks, toilets, baths, washing machines, and dishwashers. This water has picked up soap, food particles, and other unmentionables along the way, so it needs proper treatment before returning to the environment.

    Here’s where things get historically interesting: if your property was built before 1970, you might have a combined system where one pipe handles both rainwater and wastewater. This was the standard approach back then, and if you’ve got one, you don’t need to change it. However, most properties built after 1970 have separate drains, and that’s where proper connections become crucial.

    The key difference between these systems lies in where the water ends up. Rainwater drains typically flow directly to rivers and streams without treatment, while wastewater goes to treatment facilities where it’s cleaned before being released back into waterways.

    Why proper connections matter when it comes to drainage pipes

    Getting your drain connections wrong isn’t just a minor inconvenience — it’s an environmental issue that can have serious consequences. When wastewater accidentally flows into the rainwater drainage system, untreated sewage ends up flowing directly into rivers, streams, and coastal waters.

    This misconnection creates water pollution that affects wildlife, damages ecosystems, and can make beaches unsafe for swimming. Fish populations suffer, water quality deteriorates, and what should be pristine natural environments become contaminated with household chemicals, detergents, and organic waste.

    From a legal standpoint, homeowners and landlords are responsible for ensuring their properties have correct drain connections. While you might not face immediate penalties for existing misconnections, you could be liable for environmental damage, and you’re certainly obligated to fix any problems you discover.

    The environmental impact extends beyond your immediate area too. Pollution from misconnected drains can travel considerable distances downstream, affecting communities and wildlife far from the original source. It’s a problem that multiplies when several properties in an area have similar issues.

    How to recognise right or wrong drain connections

    Spotting incorrect drain connections requires a bit of detective work, but there are several telltale signs that can help you identify problems. Visual cues are often your first indication that something’s amiss.

    Look around your property for different types of drains and gullies. Rainwater should flow from gutters and downpipes into surface water drains, while wastewater from kitchens, bathrooms, and utility rooms should connect to separate foul water drains. If you see pipes from your kitchen or bathroom connecting to the same system as your roof drainage, you’ve likely found a problem.

    Pay attention to unusual smells around outdoor drains. Surface water drains shouldn’t smell unpleasant — if they do, there’s a good chance wastewater is flowing where it shouldn’t be. Similarly, if you notice detergent suds or unusual discoloration in surface water drains during wet weather, this often indicates washing machine or dishwasher connections are wrong.

    Connecting gutters and gullies correctly

    Your gutters and gullies should only collect rainwater and connect to the surface water system. Any pipes carrying wastewater should never join this network. Conversely, if rainwater systems are mistakenly connected to foul water drains, you risk overwhelming the wastewater treatment system during heavy rainfall, potentially causing flooding or system failures.

    Look for obvious misconnections like washing machine waste pipes joining gutter downpipes, or kitchen waste flowing into surface water gullies. These connections might seem logical from a “water is water” perspective, but they create significant environmental problems.

    Checking your drain connections: a DIY guide

    Before you start investigating your drainage system, gather a few basic tools: a torch, garden hose, and perhaps a small mirror for looking into awkward spaces. Safety should be your priority — never remove drain covers or attempt to access underground pipes without proper precautions.

    Start your inspection during dry weather when you can clearly see where different pipes connect. Begin at your roof level, following the path of gutters and downpipes to see where they discharge. These should lead to surface water drains or soakaways, not to any system that also receives wastewater.

    Next, trace the outlets from your kitchen, bathrooms, and utility room. Kitchen sinks, washing machines, dishwashers, toilets, baths, and showers should all connect to the foul water drainage system. If you find any of these appliances draining into surface water systems, you’ve identified a misconnection.

    A simple test involves running water from different sources while observing where it emerges. Run your kitchen tap and see which drain the water appears in. Do the same with your washing machine and other appliances. If kitchen or bathroom water appears in surface water drains, you’ll need professional help to correct the connections.

    For a more thorough check, you can use food colouring in your washing machine or sink to trace water flow, though this should be done sparingly and with environmentally friendly dyes.

    What to do if you find incorrect connections

    Discovering wrong drain connections might feel overwhelming, but don’t panic — and definitely don’t attempt to fix complex drainage issues yourself. Professional plumbers have the expertise, tools, and legal knowledge required to correct these problems safely and effectively.

    callus

    DIY drainage repairs can easily make problems worse, potentially causing flooding, structural damage, or creating additional environmental hazards. What seems like a simple pipe rerouting often involves underground work, building regulations compliance, and coordination with local water authorities.

    When you contact a professional like BDS Drainage, we’ll assess your specific situation and provide a comprehensive solution. This might involve installing new pipework, rerouting existing connections, or upgrading parts of your drainage system to meet current standards.

    The cost of professional repairs is typically much less than dealing with the consequences of incorrect DIY fixes, environmental damage claims, or flooding caused by botched drainage work.

    Drain connections in a rented property

    If you’re renting your home, drainage connection issues aren’t your responsibility to fix, but they are your responsibility to report. As a tenant, you should notify your landlord or property manager immediately if you discover or suspect incorrect drain connections.

    Document any problems you find with photos and written descriptions, and keep records of your communications with your landlord. Most reputable landlords will address drainage issues promptly, especially when they understand the environmental and legal implications.

    Landlords have a legal duty to ensure their properties don’t cause environmental pollution, so they’re motivated to fix these problems quickly. If your landlord is unresponsive, you can contact your local council’s environmental health department for advice and support.

    Checking drain connections before you buy a property

    Smart property buyers include drainage assessments in their surveys. Ask your surveyor to specifically check drain connections and note any concerns in their report. This can save you significant costs and hassle after purchase.

    If drainage problems are discovered during the buying process, you can negotiate with the seller to fix them before completion or adjust the purchase price to account for necessary repairs.

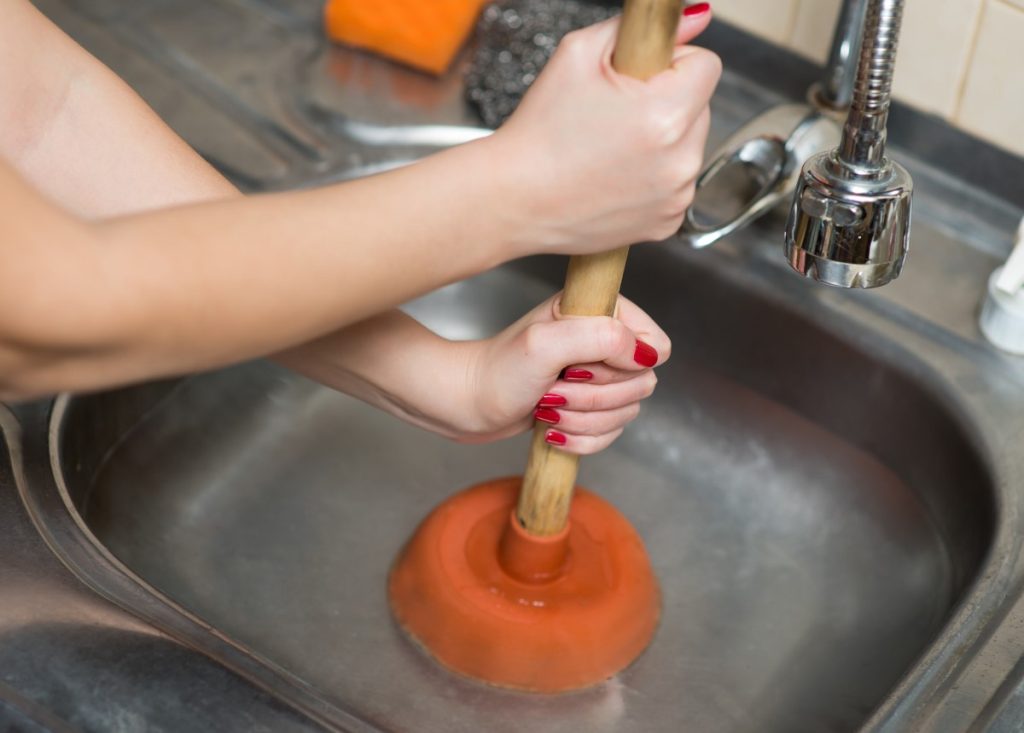
    How to avoid blocked drains

    Prevention is always better than cure when it comes to drainage problems. Proper use of your household drainage system will keep it functioning effectively and prevent costly blockages.

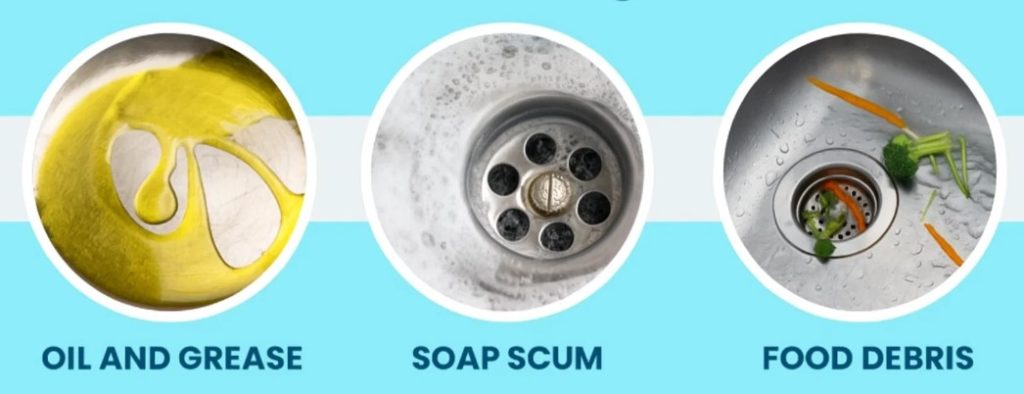
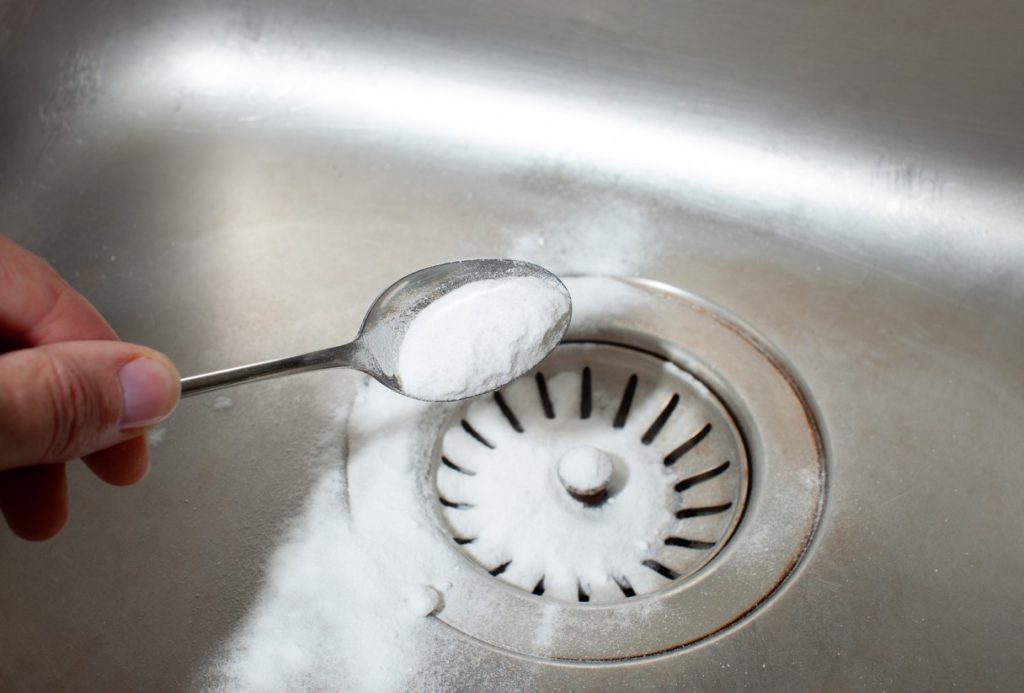
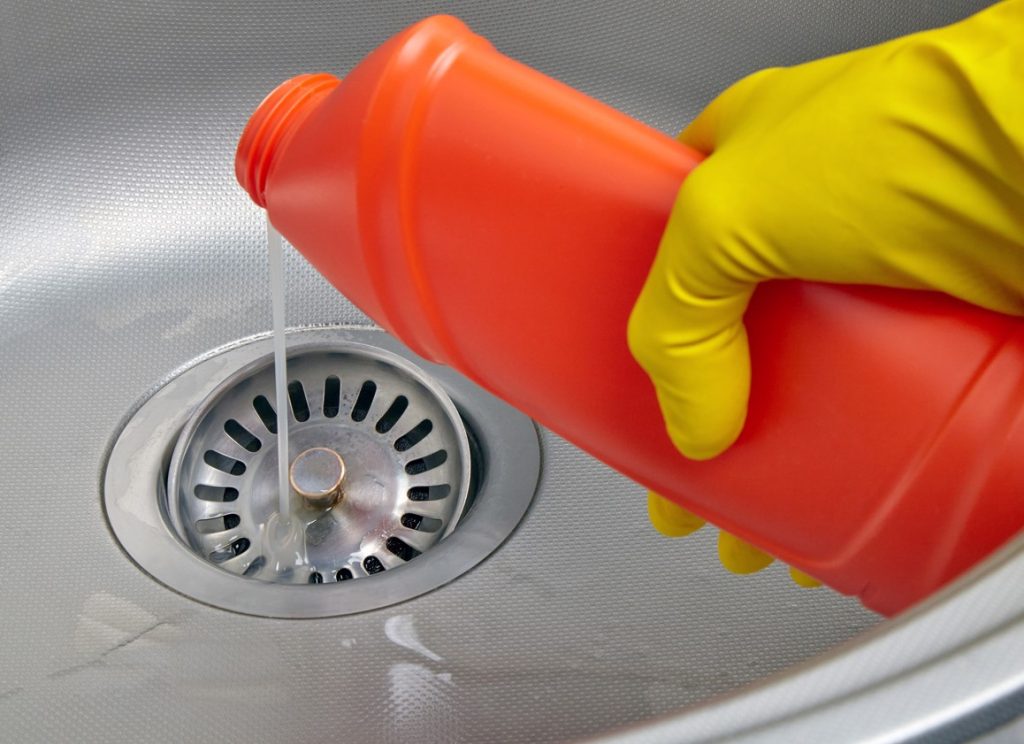
    Never put fats, oils, or grease down kitchen drains — these solidify in pipes and create stubborn blockages. Instead, let cooking fats cool and solidify, then scrape them into your household bin. Similarly, avoid putting coffee grounds, food scraps, or cleaning chemicals down surface water drains.

    Toilets aren’t rubbish bins. Items like nappies, cotton buds, wet wipes, sanitary products, and medications should go in your household waste, not down the loo. Even products labeled as “flushable” can cause blockages and processing problems at treatment facilities.

    Regular maintenance helps prevent problems. Clear leaves and debris from gutters, and avoid planting trees with aggressive root systems near drainage pipes. If you notice slow drainage or unusual smells, address them promptly before they become major problems.

    Take action to protect your property and the environment

    Your household drainage system might not be the most glamorous part of homeownership, but getting it right makes a real difference to your local environment and community. Proper drain connections prevent pollution, protect wildlife, and ensure your home meets its legal obligations.

    If you’ve discovered potential problems while reading this guide, don’t wait to address them. Environmental damage can happen quickly, and early intervention is always more cost-effective than emergency repairs.


    FAQ


    How can I tell if my property has combined or separate drains?

    Properties built before 1970 typically have combined systems, while newer homes usually have separate drains. Check your property’s age and look for single or multiple drainage outlets around your home. When in doubt, a professional drainage survey can provide definitive answers.

    What should I do if I find a misconnection?

    Don’t attempt DIY fixes. Contact a qualified plumber or drainage specialist immediately. Document the problem with photos and avoid using affected appliances until repairs are completed.

    Are there grants available for fixing drainage problems?

    Some local councils offer grants or financial assistance for environmental improvements, including drainage corrections. Contact your local authority to enquire about available schemes in your area.

    Will a soakaway crate system help with rainwater drainage?

    Yes, a soakaway crate system can be an effective way to assist your surface water drain by managing rainwater runoff . These systems are designed to collect, store, and gradually release rainwater and storm water from houses and buildings back into the surrounding soil, reducing the risk of surface water flooding.

    They are particularly useful in areas with porous soil and can help prevent waterlogging by diverting excess water away from buildings and paved surfaces. However, the suitability of a soakaway crate system depends on factors like soil type, water table levels, and local regulations, so it’s advisable to consult a professional before installation.

    How much does it cost to fix incorrect drain connections?

    Costs vary depending on the complexity of the work required. Simple reconnections might cost a few hundred pounds, while extensive repairs could cost several thousand. Professional assessment will provide accurate estimates.

    Can incorrect drain connections affect my home insurance?

    Potentially yes. If drainage problems cause flooding or environmental damage, insurance claims could be affected if you knew about connection issues but didn’t address them. Maintaining proper drainage protects both your property and your coverage.

    How often should I check my drain connections?

    Annual visual inspections are recommended, particularly before winter weather. Professional drainage surveys every 5-10 years can identify developing problems before they become serious.


    Ready to ensure your drainage system is working correctly?

    At BDS Drainage, we’ve helped hundreds of homeowners understand and correct their drainage systems. Our experienced team can assess your property, identify any issues, and provide professional solutions that protect both your home and the environment.

    Ready to ensure your drainage system is working correctly? Contact BDS Drainage today for a comprehensive assessment and free quote. Let us help you become part of the solution to cleaner waterways and a healthier environment.

  • Kitchen drain clogged? Here’s how to clear it

    Kitchen drain clogged? Here’s how to clear it

    Nothing ruins a good day quite like discovering your kitchen sink is blocked. One moment you’re washing up after a lovely Sunday roast, and the next you’re staring at a pool of murky dishwater that’s going absolutely nowhere. Sound familiar?

    Don’t panic. A clogged kitchen drain might feel like a plumbing disaster, but most blockages can be sorted with a few simple tricks you probably already have at home. This guide will walk you through everything you need to know about clearing a blocked kitchen sink, from quick DIY fixes to knowing when it’s time to call in the professionals.

    Whether your sink is draining slowly or completely blocked, we’ve got practical solutions that actually work. Plus, we’ll share some brilliant prevention tips to help you avoid this soggy mess in the future.

    Common causes of kitchen drain clogs

    causes of kitchen sink clogged

    Before you start tackling that stubborn blockage, it helps to understand what’s causing the problem in the first place. Kitchen sinks face a daily assault from three main culprits that love to team up and create chaos in your pipes.

    Oil and grease

    Here’s the biggest villain in your drainage story. Pouring hot cooking oil down the drain might seem harmless, but it’s actually creating a ticking time bomb in your pipes. When that grease cools down, it solidifies and clings to your pipe walls like an unwelcome guest who won’t leave. Over time, this greasy layer catches other debris floating by, gradually building up until your sink won’t drain at all.

    Soap scum

    You might be scratching your head at this one. Soap is meant to clean things, right? Unfortunately, when soap mixes with the minerals in your tap water, it creates a sticky residue called soap scum. This gunky buildup coats your pipes and provides the perfect surface for food particles and other debris to stick to.

    Food debris

    Even the tiniest food scraps can cause big problems when they accumulate in your pipes. Coffee grounds, rice grains, pasta bits, and vegetable peelings might seem innocent enough, but they love to gather together and form stubborn blockages, especially when mixed with grease and soap scum.

    DIY methods to unblock kitchen sink

    Ready to roll up your sleeves? These tried-and-tested methods can help restore your kitchen sink to its former glory without costing a fortune.

    Boiling water/hot water

    hot boiling water into sink

    Sometimes the simplest solutions are the most effective. If your kitchen drain is clogged with grease or oil, boiling water (or even just hot water) can work wonders. Fill your kettle to the brim and bring it to a rolling boil. Slowly pour the entire contents down the drain, taking care not to splash yourself.

    When you pour boiling water, the heat helps dissolve greasy buildup and flush away loose debris. This method works best for minor blockages and is particularly effective if you tackle the problem early when your sink is just starting to drain slowly.

    Pour baking soda and vinegar down the blocked sink

    pour baking soda in kitchen sink

    This classic cleaning combo creates a powerful fizzing reaction that can break down stubborn blockages. Start by letting your sink drain as much water as possible. Pour about half a cup of baking soda (that’s bicarbonate of soda, not baking powder) directly down the drain, followed by a cup of white vinegar.

    You’ll hear satisfying fizzing and bubbling sounds as the mixture gets to work. Leave it to do its magic for at least 30 minutes, then flush everything through with hot water from the kettle. This method not only helps clear blockages but also neutralises unpleasant odours lurking in your pipes.

    Chemical plughole unblockers for kitchen sinks

    chemical drain unblocker

    When gentle methods aren’t cutting it, commercial drain unblockers can provide extra muscle. You’ll find these in most supermarkets and hardware shops, but always read the instructions carefully and follow safety precautions.

    Wear rubber gloves, ensure good ventilation, and never mix different chemical products. These solutions contain powerful ingredients that can dissolve organic matter, but they should be used sparingly and as a last resort before calling professionals.

    Proper plunging technique

    apply plunger to the kitchen sink

    If your sink not draining at all, a plunger might be your best friend. Here’s the key: you need water in the sink to create an effective seal. Fill the sink with enough water to cover the plunger head, position it directly over the plughole, and push down firmly several times.

    The suction and pressure can help dislodge blockages and get water moving again. Remove the plunger and check if the water starts draining. You might need to repeat this process a few times to fully clear the obstruction.

    Using a plumber’s snake/pipe snake

    drain snake for unclog kitchen sink

    For particularly stubborn blockages, a plumber’s snake (also called a drain auger) can be incredibly effective. You don’t need to splash out on an expensive professional version – cheap plastic ones work perfectly well for most kitchen sink blockages.

    Insert the snake into the plughole and slowly work it down the drain. It should navigate around the U-bend without too much resistance. When you reach the blockage, try to break it up by twisting and pushing the snake. If the blockage won’t budge, try hooking it with the snake’s barbs and pulling it back up the drain.

    Leave some water in the sink while you work so you can see if your efforts are making a difference. Once you’ve cleared the main obstruction, flush the pipes with hot water to remove any remaining debris.

    Tips to prevent sink blockages

    They say prevention is better than cure, and this couldn’t be truer when it comes to a clogged kitchen sink. A few simple habits can save you from future plumbing headaches.

    Never pour cooking fat, oil, or grease down the drain. Instead, let it cool and solidify, then scrape it into the bin or collect it in a jar for proper disposal. When washing greasy pans, use plenty of hot water and keep it running for a minute after you’ve finished to help flush away any residual grease.

    Install a plughole screen or strainer to catch food debris before it disappears down the drain. Yes, it means an extra bit of washing up, but it’s much easier than dealing with a blocked sink later. These handy devices catch everything from coffee grounds to pasta scraps.

    Make it a habit to regularly flush your kitchen drain with hot water. A kettle full of boiling water once a week can help dissolve minor buildup before it becomes problematic. Think of it as a weekly health check for your pipes.

    When to call drainage experts

    Sometimes, despite your best DIY efforts, a slow draining kitchen sink or completely blocked drain requires professional attention. Recognising when to call in drainage experts for a clogged drain can save you time, money, and potentially costly damage to your plumbing system.

    If you’ve tried multiple DIY methods and your kitchen sink is blocked as stubbornly as before, it’s time to admit defeat. Professional drainage experts have specialised equipment like high-pressure water jets and industrial-grade drain cameras that can tackle blockages beyond the reach of household remedies.

    Call the professionals if you notice water backing up into other sinks or drains, foul smells that persist despite cleaning, or gurgling sounds coming from your pipes. These symptoms often indicate deeper issues in your drainage system that require expert diagnosis and treatment.

    Time to tackle that troublesome drain

    Dealing with a kitchen sink that’s blocked doesn’t have to ruin your day. Armed with these practical solutions, you can tackle most drainage problems with confidence and get your kitchen back to working order.

    Start with the gentler methods like boiling water or baking soda and vinegar, and work your way up to more intensive solutions if needed. Remember, regular maintenance with simple hot water flushes can prevent most blockages from occurring in the first place.

    However, some drainage problems require professional expertise. If your DIY efforts aren’t working, or you’re dealing with recurring blockages, don’t hesitate to seek help from qualified drainage experts.


    Frequently asked questions


    How do I know if my kitchen drain is completely blocked or just draining slowly?

    A slow-draining sink will eventually empty, albeit much more slowly than usual. You’ll notice water taking ages to disappear after washing up. A completely blocked drain won’t drain at all – water will just sit there looking miserable.

    Can I use bleach to unblock my kitchen sink?

    While bleach can help with odours and bacteria, it’s not particularly effective at dissolving the grease and food debris that typically cause kitchen sink blockages. Stick to the methods outlined above for better results.

    How often should I clean my kitchen drain?

    Give your drain a weekly flush with boiling water and do a monthly baking soda and vinegar treatment. This regular maintenance can prevent most blockages from developing.

    Is it safe to use a plunger on a kitchen sink?

    Absolutely! Just make sure you’re using a cup plunger (the type with a flat bottom) rather than a toilet plunger. Always ensure there’s water in the sink to create a proper seal.

    What should I do if multiple drains are blocked?

    If several drains in your home are affected, this suggests a problem with your main drainage system. Don’t attempt DIY solutions – call professional drainage experts immediately.


    Ready to get your kitchen sink flowing freely again?

    At BDS Drainage, we understand how frustrating plumbing problems can be. Our experienced team has the tools and expertise to diagnose and resolve even the most stubborn drainage issues quickly and efficiently. Whether you’re dealing with a simple blockage or complex drainage problems, we’re here to help.

    Ready to get your kitchen sink flowing freely again? Contact BDS Drainage today for a free quote and discover why homeowners across the region trust us with their drainage needs. Don’t let a blocked sink disrupt your daily routine – professional help is just a phone call away.

  • What is Trenchless Drain Repair and How Much will it Cost Me?

    What is Trenchless Drain Repair and How Much will it Cost Me?

    Nobody wants to think about their drains until something goes wrong. One day you’re happily going about your business, and the next you’re dealing with mysterious gurgling sounds, slow drainage, or worse—a complete blockage that has you reaching for the phone in desperation.

    At BDS Drainage, we’ve seen it all. From minor pipe hiccups in a sewer pipe to major underground disasters, we understand that drain problems can turn your world upside down. But here’s the good news: modern trenchless drain repair technology means fixing your pipes doesn’t have to involve turning your garden into an archaeological dig site.

    This guide will walk you through everything you need to know about trenchless drain repair, from understanding the process to working out what it might cost you. By the end, you’ll be armed with the knowledge to make an informed decision about your drain repair needs.

    What is trenchless drain repair?

    Traditional drain repair could be a nightmare scenario. Engineers might arrive with diggers, tear up your driveway, destroy your prized rose bushes, and leave you with a garden that looked like a construction zone. The whole process could take days or even weeks, with costs spiralling as quickly as the mess in your garden.

    Trenchless drain repair work changed all that. This innovative approach allows drainage specialists to fix or replace your pipes without the extensive digging that traditional methods require. Instead of excavating the entire length of the damaged pipe, technicians only need small access points when fixing underground pipes and completing repairs.

    The benefits are impressive:

    Minimal disruption

    Your landscaping, driveway, and daily routine remain largely intact

    Faster completion

    Most jobs finish within a day or two

    Cost effective

    Reduced labour and restoration costs

    Durable results

    Modern materials often last longer than traditional pipes

    Reduced environmental impact

    Trenchless drain repair reduces environmental impact by minimising soil disruption and preserving local ecosystems through small access points instead of extensive digging.

    Methods of trenchless drain repair

    Trenchless drain repair includes two main methods: pipe relining, which inserts a liner into the existing pipe, and pipe bursting, which breaks the old pipe and replaces it simultaneously.

    Drain relining/ Pipe lining

    trenchless drain repair using Pipe relining

    Pipe relining is like giving your drain a new lease of life from the inside out. The process involves inserting a flexible liner coated with resin into the existing pipe wall. Once in position, the liner is inflated and cured, creating a seamless new pipe within the old one — known as a cured in place pipe.

    Trenchless pipe repair works brilliantly for pipes with cracks, minor collapses, or root intrusion. The new liner is typically made from materials like fibreglass or felt, which become incredibly strong once the resin hardens. Most relined pipes come with warranties of 50 years or more.

    The main limitation? If your pipe has completely collapsed or has major structural issues, relining might not be sufficient.

    Pipe bursting

    When your existing pipe is beyond salvation, pipe bursting might be the answer. This technique involves pulling a new pipe through the old one whilst simultaneously breaking apart the damaged pipe. The old pipe fragments are pushed into the surrounding soil, making room for the replacement.

    Pipe bursting works well for severely damaged pipes and can even accommodate larger diameter replacements. However, it’s generally more expensive than relining and requires more specialised equipment.

    Both methods require skilled technicians and proper equipment, so choosing an experienced provider like BDS Drainage is crucial for success.

    Factors affecting the cost

    The cost of trenchless drain repair depends on several variables, much like buying a car depends on the make, model, and features you choose.

    Type of repair needed: Pipe relining typically costs less than pipe bursting, but the choice depends on your pipe’s condition rather than your budget preferences.

    Pipe specifications: Longer pipes cost more to repair, as do larger diameter pipes. A 50-metre sewer line will obviously cost more than a 10-metre section.

    Materials used: High-quality liners and pipes cost more upfront but often provide better long-term value through increased durability.

    Job complexity: Pipes in awkward locations, deep underground, or with multiple bends require more time and expertise, affecting the price.

    Geographic location: Costs vary across different regions, with urban areas typically commanding higher prices than rural locations.

    Additional services: CCTV inspections, pipe cleaning, and post-repair testing may add to the total cost but are often essential for a complete solution.

    Trenchless drain repair cost

    For most residential trenchless drain repair jobs, you can expect to pay between £150-£500 per metre, depending on the factors mentioned above. A typical household repair might range from £1,500 to £4,000, though complex jobs can cost more.

    Compared to traditional excavation methods, trenchless repair often provides better value. When you factor in the costs of digging, restoration, landscaping, and potential structural repairs to driveways or patios, traditional methods can easily exceed trenchless costs.

    The long-term benefits make the investment even more attractive. Modern trenchless repairs typically last 50-100 years, compared to 20-30 years for traditional pipe repairs. This longevity means fewer future repairs and lower lifetime costs.

    When to consider trenchless drain repair

    Several warning signs suggest your drains might need professional attention:

    Slow drainage: If water takes ages to disappear down your sinks, showers, or toilets, you might have a blockage or pipe damage.

    Unusual sounds: Gurgling, bubbling, or other strange noises from your drains often indicate air trapped by blockages or damage.

    Unpleasant odours: Persistent sewage smells suggest problems with your drainage system.

    Pipe age and material: Older pipes, particularly clay or cast iron ones, are more prone to problems and might benefit from proactive replacement.

    Environmental considerations: If your pipes run under valuable landscaping, structures, or environmentally sensitive areas, trenchless repair makes perfect sense.

    Choosing a trenchless drain repair service

    Selecting the right drainage company is crucial for a successful repair. Here’s what to look for:

    Proper licensing and insurance: Ensure your chosen company holds relevant certifications and carries adequate insurance coverage.

    Reputation and reviews: Check online reviews, ask for references, and verify the company’s track record with similar projects.

    Multiple quotes: Get quotes from several providers to ensure fair pricing, but remember that the cheapest option isn’t always the best value.

    Warranty coverage: Reputable companies offer warranties on their work, providing peace of mind for your investment.

    Transparent pricing: Avoid companies that won’t provide clear, detailed quotes or seem evasive about costs.

    Making the smart choice for your drains

    Trenchless drain repair represents a significant advancement in drainage technology, offering homeowners a less disruptive, more cost-effective solution to pipe problems. While the upfront costs might seem substantial, the long-term benefits—including durability, minimal disruption, and reduced future maintenance—make it an intelligent investment.

    The key to success lies in choosing the right repair method for your specific situation and working with experienced professionals who can deliver quality results.

    BDS Drainage: Your trenchless repair experts

    bds drainage van

    At BDS Drainage, we’ve built our reputation on providing innovative drainage solutions that make sense for our customers. Our team brings years of experience in trenchless repair techniques, combined with a commitment to quality workmanship and customer satisfaction.

    We understand that drain problems can be stressful, which is why we focus on clear communication, transparent pricing, and minimal disruption to your daily life. From initial inspection to completed repair, we’re with you every step of the way.

    Ready to solve your drainage problems the modern way? Contact BDS Drainage today for a professional inspection and detailed quote. Your drains—and your garden—will thank you.

  • Different Types of Drainage Systems

    Different Types of Drainage Systems

    When was the last time you gave your drainage system a second thought? Probably never, right? The truth is, effective drainage systems are the unsung heroes of our daily lives, quietly preventing waterlogging, structural damage, and disrupted plumbing. Whether it’s keeping your garden pristine or making sure stormwater doesn’t flood your home, drainage systems are vital.

    At BDS Drainage, we have years of experience ensuring homes and businesses are protected from water-related damage. With this blog post, we’ll unravel the mysteries of drainage systems and provide a comprehensive guide on how they work and why they’re so important.

    What is a drainage system?

    At its core, a drainage system is a structure or network designed to direct water away from specific areas, be it homes, gardens, or public roads. Its primary goal is simple yet critical—to prevent water build-up, which can lead to erosion, water damage, and health concerns caused by standing water.

    Without a functioning drainage system, water can wreak havoc on your property. Puddles may seem harmless at first, but over time, they can weaken your home’s foundation, flood basements, and even lead to pesky mould and mildew issues. Installing and maintaining the right kind of drainage system ensures the longevity and integrity of your property.

    Types of drainage systems

    Modern drainage systems come in various forms, each suited for specific scenarios. From managing garden runoff to routing stormwater away from your home, here are the key types as well other drainage systems you should know:

    Surface water drainage systems

    surface drainage system

    Surface drainage systems are perhaps the most visible kind. They focus on removing water from the land’s surface, such as your lawn, driveway, or even a football pitch.

    How do they work? These systems use shallow channels or ditches to guide water away from the surface. The land is often graded or sloped to help water flow more efficiently into these channels. Here are a few examples:

    • Open drains: Channels dug into the ground to remove excess water.
    • Humps and hollows: A design that relies on slightly raised and lowered surfaces to guide water.
    • Levees: Raised barriers created to divert water flow and manage flow velocity.
    • Grassed waterways: Areas planted with grass designed to slow, filter, and direct water runoff. Often seen in protected areas or as part of a sustainable development.

    One specific example of a surface drainage system is cast-in-place trench drains. These simple yet effective solutions are often used in commercial and industrial spaces to channel surface runoff effectively.

    Subsurface drainage systems (French drains)

    Subsurface drainage system

    Subsurface drainage systems take things a step further. Unlike surface drainage, they are installed beneath the top layer of soil and are ideal for addressing water that accumulates below ground. These systems are commonly called French drains.

    French drains are networks of perforated pipes placed within trenches filled with gravel, guiding water away from the soil’s root level. They’re perfect for keeping waterlogged gardens or farms well-drained. If you’ve noticed soggy patches of grass or plants not growing well, this system might just be your answer.

    Slope drainage systems

    Slope drainage systems

    Slope drainage systems are designed to do exactly what their name suggests—guide water down a slope. These systems are ideal for hilly terrains where water needs to flow downward to prevent pooling near structures. How is this achieved? By using pipes anchored along an incline to swiftly move water away from critical areas.

    Your home’s downspouts and gutter systems are excellent examples of slope drainage systems in action. They act as your first line of defence during heavy rain, collecting water from your roof and directing it away from your home.

    These systems often route water into:

    • Aluminium extensions or downspout drains.
    • Buried drainpipes.
    • Rain barrels.
    • Underground pipes and sewer lines for urban settings.

    With gutter systems, water passes effortlessly from your roof to its designated outlet, leaving no chance for pooling or over-saturation.

    Common drainage system problems

    Even the best-planned drainage system isn’t immune to problems. Here are some common issues that can compromise its functionality:

    Blockages in gutter drains

    Debris, sediment, and leaves can clog drainage systems, preventing water from flowing as intended. Over time, this can cause overflow and water damage.

    Poor design

    A drainage system is only as good as its design. Poorly executed drainage solutions may cause water to pool in unwanted areas, defeating its very purpose. Always consult drainage experts for proper planning and installation.

    Root intrusion

    Tree roots have a knack for finding and infiltrating drainage pipes, causing cracks and blockages. This is especially common in older clay pipes.

    Cracks and collapses

    Over time, wear and tear, weather conditions, or even heavy structures above the ground can lead to cracks or collapses in pipes, severely affecting how your drainage system functions.

    Why understanding drainage matters

    Knowledge is power, even when it comes to drainage systems. By understanding the types of drainage systems available and the problems they can face, homeowners and businesses alike can make informed decisions about installation and maintenance.

    Actively avoiding delays in addressing drainage issues can save you from costly repairs in the future. Whether it’s designing a new system for a landscaped garden or upgrading an old one in your home, knowing your options makes a world of difference.

    BDS Drainage: your go-to drainage experts

    At BDS Drainage, we’re passionate about keeping your properties safe and dry. With years of expertise, we provide tailored services to suit your unique needs—from inspections and maintenance to repairs and installations.

    Whether it’s dealing with blocked drains or designing a new system, our team of drainage experts has got you covered. Don’t leave your drainage to chance; contact us today for reliable and efficient solutions you can count on.