Author: BDS One base Media

  • Rising Damp Treatment: Causes & Signs + Rising Damp Solutions

    Rising Damp Treatment: Causes & Signs + Rising Damp Solutions

    [vc_row][vc_column][vc_column_text]Do you suspect your property has rising damp issues?

    Would you like to learn about the causes of those problems and the best ways to prevent them?

    Then you’ve come to the right place today because this in-depth article is going to fill you in on everything you need to know.

    With a bit of luck, reading all this information will ensure you can deal with your rising damp because it causes mould and potentially many structural issues.

    In most instances rising damp affects old houses more than new ones due to improved drainage and other advancements.

    However, nobody is 100% protected from the damage damp can cause, and that is why reading this article is critical.[/vc_column_text][/vc_column][/vc_row][vc_row][vc_column][vc_column_text]


    Need help with rising damp? Speak to an expert now:

    08081 689 112


    What is Rising Damp?

    Rising Damp was a 1970s TV comedy show starring Leonard Rossiter that was exceptionally popular in the UK for many years.

    However, being as you’re reading about property maintenance, we’ll presume that isn’t the rising damp you’re dealing with at the moment.

    When it comes to houses and other buildings, rising damp is moisture that forms on your walls as a result of groundwater.

    It tends to happen when there is a slope towards your home, and rain gathers underneath or next to the walls.

    The moisture rises through the fabric of the structure regardless of the material. So, that can become an issue for houses built using bricks, stone, or just about anything else.

    The scientific term for water rising up the walls is capillary action, and that explains how the liquid works against gravity to cause problems in your home.

    At some point, gravity counteracts capillary action, and that is where the damp should cease to move any further.

    Rising damp can reach heights of one or two metres in many instances, and so it can ruin a workplace or a family home by encouraging mould and decreasing the strength of the structure.

    In many situations, the effects of the damp will reach higher up the wall than the moisture itself.[/vc_column_text][/vc_column][/vc_row][vc_row][vc_column][vc_column_text]

    What Are the Signs of Rising Damp?

    If you think you have a rising damp issue at the moment; you just need to take a look for any of the following warning signs.

    If you notice any of these symptoms, it makes sense to look for remedies or get in touch with professionals as soon as possible.

    People who waste time will only make the situation worse and cause themselves more hassle.

    The cost of solving the problem could also increase if you don’t deal with it promptly.


    Signs of rising damp:

    ● Sometimes you will notice a damp and musty smell before encountering any evidence of damp inside the property.

    ● In many situations, people with a damp problem at home will see mould and other fungus growing on the affected walls.

    ● If you have wallpaper, there is a decent chance that moisture could cause it to peel, and those with painted rooms might see blisters.
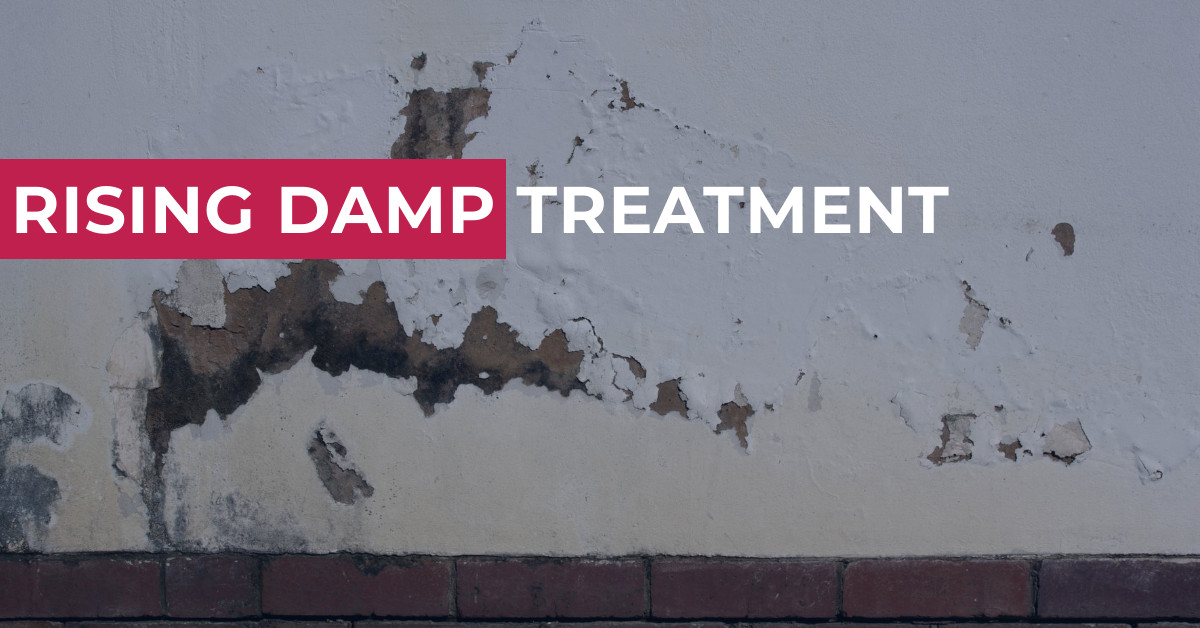
    Dark patches and wet walls are a sure-fire indication that you have damp issues in the home you need to resolve.

    Discoloured or damaged plaster is another sign of which you need to keep your eyes peeled. Most people notice that when the time comes to decorate and they remove wallpaper from their walls.

    ● The decay of any wood in the structure could also highlight the need for some damp treatment. That tends to happen around window and door frames.

    Skirting boards can often show the signs of damp before anywhere else. That is because they sit at the bottom of the wall, and that is the area in which the moisture is most prevalent.

    Salt stains on the exterior brickwork of your property could mean those structures have become wet.

    ● Lastly, if you notice that mortar on the outside of your home begins to crumble, it’s probably time for a damp check![/vc_column_text][/vc_column][/vc_row][vc_row][vc_column][vc_column_text]

    What Causes Rising Damp?

    In many instances, rising damp manifests when a property doesn’t have a damp-proof course or that protection becomes damaged. A damp-proof course is a waterproof layer in the walls of a home that repels rainwater.

    Ideally, it should sit around six inches above the exterior ground level, and the item will stop any rising moisture in its tracks. If your damp-proof course doesn’t function as expected, there is a decent chance that rising damp can occur.

    In situations where the damp-proof course works perfectly, damp can happen because of a breach in the DPC. That means something lodged or attached to the walls enables liquid to move around the damp-proof course and penetrate your property.

    The damp will continue to rise until gravity takes hold and prevents it from going any further. Experts claim that often happens when the ground outside the building rises over time and exceeds the height of the original damp-proof course.

    There are also cases in which rising damp happens due to wall cavities that contain lots of waste or building materials. That can create somewhat of a bridge for moisture to move from the ground upwards.

    Internal plaster connected to a solid floor produces the same effects in many instances.[/vc_column_text][/vc_column][/vc_row][vc_row][vc_column][vc_column_text]

    How Do I Treat Rising Damp?

    There are many different options on the table when it comes to treating rising damp, and the best course of action will depend upon the cause of the issue.

    So, it’s vital that you identify the problem ahead of time and work out why it’s happening. You can then select the most appropriate treatment from the suggestions made below. Using the wrong solution could mean you spend a fortune and never manage to resolve your moisture problem.

    Whatever happens, make sure you don’t opt for a quick fix like painting over the mould and damp on your walls because that will just make the situation worse and cause more spending in the long run. Instead, you need to work out the cause and deal with it accordingly.

    If the rising damp is caused by a blocked cavity wall

    If you determine that your issue relates to blocked cavity walls; you just need to make a small hole in the structure and unblock it.

    You can call a professional to assist with that process if you don’t feel confident with the idea of putting holes in your home. Their services should not break the bank, and the job should take no longer than a few days even in the most extreme cases.

    If the rising damp is caused by a bridged damp-proof course

    Homeowners who recognise their damp-proof course is bridged in some way just need to reverse the issue. For this post, let’s presume the ground outside is now higher than the DPC.

    In that instance, you just need to dig a small trench around the perimeter of your house and ensure the earth no longer reaches above that section of the structure.

    Just be sure to slope the bottom of the trench you dig so that water does not accumulate in the area. You could use a French drain or something similar if that becomes a problem.

    If you can’t remove the objects bridging your damp-proof course

    In some situations, you might struggle when it comes to moving the earth or other material out of the way that is blocking your DPC. Still, there is no need to stress because you can always improve the protection you have and prevent further rising damp.

    You just need to add a new damp-proof course to your walls for the best results. Nothing is wrong with installing a DPC above your existing solution or adding one to the property for the first time.

    With a bit of luck, that will help to ensure your house does not suffer stability issues or mould infestations in the future.[/vc_column_text][/vc_column][/vc_row][vc_row][vc_column][vc_column_text]

    Are There Different Types of Damp-proof Course (DPC)?

    Yes! There are three main variations of DPC of which you need to become aware if you want to get the damp treatment right.

    When building a house, the construction workers will usually use a sheet made of metal or plastic to protect the structure.

    Unfortunately, that is challenging once the home is already complete, and so you have to take a look at some of the other options on the table.

    Rising Damp Solutions

    1. Some people choose to make use of water repellent chemicals they can inject into the affected areas of their walls to provide some extra protection. That often works well, and the products come in many different forms including gels, pastes, and creams.
    2. Those who want to go a little further might consider using a pore-blocking salt concoction. You’ll have to inject that into the walls again, but the salt should help to soak up any moisture that makes its way into the cavity.
    3. Lastly, the technique of osmotic water repellency tends to perform well in professional situations, and that involves the use of embedded wires. You probably won’t have to use that last suggestion in most instances.

    [/vc_column_text][/vc_column][/vc_row][vc_row][vc_column][vc_column_text]

    What is the Process of Using Water-repellent Chemicals?

    If you plan to try water repellent chemicals when dealing with your rising damp problem this year; you just need to follow the step-by-step guide outlined below.

    1. Firstly, you need to drill holes in your wall that are around 11mm in diameter for the best outcomes.
    2. Next up, you’ll have to drill through the external and internal walls.
    3. Take a moment to sit down and read the instructions on your water repellent chemical product before applying it as the manufacturers recommend.
    4. Inject the chemicals using a specialist pump that you can buy from most decent DIY stores. Just ask the staff for advice if you get stuck.
    5. Fill all the holes you made with cement or mortar.

    [/vc_column_text][/vc_column][/vc_row][vc_row][vc_column][vc_column_text]

    What is the Process of Using a Pore-blocking Salt Mixture?

    If you intend to try a pore-blocking salt mixture in your walls, the process you need to follow is quite straightforward. Just use this guide.

    1. Drill holes in your walls that are around 20 mm in diameter for the best results. Do not do that if your walls are not stable and thick because you could cause structural damage. Indeed, that is why it’s sensible to consult a professional before starting this job.
    2. Mix the pore-blocking salt mixture and inject it into the holes using an injection gun that you can buy from your DIY store or online. Make sure you get a heavy-duty item that can handle the weight of the solution because some of the cheap products on the market are likely to break when undertaking this application.

    [/vc_column_text][/vc_column][/vc_row][vc_row][vc_column][vc_column_text]

    After Treating the Walls, How Do I Repair Them?

    Damp causes many issues both inside and outside of the property, and so you’ll need to deal with them following successful treatment.

    You’ve managed to prevent any further moisture from forming, but you will have to rectify the damage caused. The best way of doing that is to use some specialist mould cleaner on your walls before letting them dry and hanging some new wallpaper.

    If you find it impossible to remove the stains, just paint the wall or the worst affected area. You can also use a salt neutraliser if you’re concerned about deposits on the exterior or interior of your home.

    In most instances, that is all you need to do to get things back on track. Other than that, some people like to strip the plaster and replace it in extreme cases. It all depends on how much damage the damp creates.[/vc_column_text][/vc_column][/vc_row][vc_row][vc_column][vc_column_text]

    Conclusion

    You should now have a reasonable understanding of the nature of rising damp and how it forms.

    You should also know a little more about the best ways to dealing with the problem and making your home or building safe again.

    Mould and other fungi can pose many health risks to human beings, and that is why you need to rectify any damp issues as soon as possible.

    The last thing any homeowner wants is for their children to end up in the hospital with breathing problems related to mould spore inhalation.

    So, use the information from this page to ensure you make all the right moves.[/vc_column_text][/vc_column][/vc_row]

  • Homemade Sink Unblocker UK – Green Ways to Naturally Unblock Drains

    Homemade Sink Unblocker UK – Green Ways to Naturally Unblock Drains

    [vc_row css=”.vc_custom_1490270327878{margin-top: 20px !important;}”][vc_column][vc_column_text]Homemade Sink Unblocker UK – If your drains aren’t flowing as easily as it should, then they are probably a bit blocked. Instead of paying loads of money for chemical-filled products, try fixing the problem yourself with a homemade drain cleaner or homemade sink unblocker. It costs basically a few pennies to make and can be used as frequently as you like to help prevent buildup.

    It is safe to use in the bathroom or kitchen, the natural sink unblocker will have your sink, tub or blocked drain flowing freely in no time. Have a really plugged pipe? We’ve got the solution for seriously stopped drains.[/vc_column_text][/vc_column][/vc_row][vc_row][vc_column][vc_column_text]

    1. Baking Soda & Vinegar

    Mix 1/3rd of a cup of baking soda with 1/3rd of a cup of vinegar in a measuring cup. This should cause an instant fizzing reaction, as quickly as you can pour the mixture down your blocked drain. The fizzing reaction will help to remove any unwanted grime or waste that has built up over time inside the pipe. Let it sit for a couple of hours or overnight if possible and then flush with hot water.[/vc_column_text][/vc_column][/vc_row][vc_row][vc_column][vc_column_text]

    2. The Effectiveness of Boiled Water

    The next method is one of the simplest ways to unblock a drain. First fill up the kettle to its maximum capacity and boil. Pour it down the blocked drain slowly in the stages, allowing the water to have an effect for several seconds between each pour. Reward yourself with a coffee if there is any remaining water left.[/vc_column_text][/vc_column][/vc_row][vc_row][vc_column][vc_column_text]


    Need help unblocking your drain? Speak to an expert now:

    08081 689 112


    3. Caustic Soda – Sodium Hydroxide

    Using Caustic Soda is also an option, however make sure you have some rubber gloves and eye protection as Caustic Soda (Sodium Hydroxide) has been known to cause some serious chemical burns. Pick up some from your local hardware store, start by pouring ¾ gallon of cold water into a bucket along with 3 cups of caustic soda and stir well with a long wooden spoon keeping your hands as far away as possible. This should cause the liquid to heat up and fizz, pour it down the drain and leave for half an hour, once this is done flush the drain with boiling water.[/vc_column_text][/vc_column][/vc_row][vc_row][vc_column][vc_column_text]

    4. Using Dish Detergent

    A clogged toilet is one of the most frustrating blockages; this can be fixed by following these steps. Firstly pour ¼ cup of dish detergent down the bowl and boil a full kettle of water. The detergent will be used as lubricant which will help get rid of any unwanted residue. After this you want to get the toilet plunger ready, Pour the boiled water down and put the plunger to use. Generally this will be enough to fully unblock your toilet however sometimes this isn’t enough in which case gloves is the next option.[/vc_column_text][/vc_column][/vc_row][vc_row][vc_column][vc_column_text]

    5. The… Wire Coat Hanger Solution

    Another simple way to fix your blockage problems involves just a wire coat hanger, hot water and patience. Straighten out the wire hanger and shape one end into a hook shape, use this tool to simply fish out anything that may be causing the blockage. The main thing with this technique is to make sure you don’t push any of the nasty stuff further into the drain.[/vc_column_text][/vc_column][/vc_row][vc_row][vc_column][vc_column_text]

    When Everything Else Fails

    These are usually the easiest and quickest ways to naturally unblock a clogged drain. If your drain remains clogged after using these homemade sink unblockers, please contact us on 08081 689112 (freephone) for a FREE, no obligation quote and advice.

    Blocked Drains London | Blocked Drains Essex | Blocked Drains Kent | Blocked Drains Surrey

  • Collapsed Drain Repair: 7 Signs You May Have a Collapsed Drain

    Collapsed Drain Repair: 7 Signs You May Have a Collapsed Drain

    [vc_row][vc_column][vc_column_text]

    All drain-related damage requires your attention as leaving it too long can lead to very costly repair jobs.

    Nonetheless, some issues are far more serious than others.

    They subsequently demand immediate action. A collapsed drain certainly falls into that category.

    There is a very long list of potential causes.

    However, they aren’t overly important until after you’ve fixed the problem and start to think about preventing repeat damage.

    Right now, the key is to get the damage rectified ASAP.

    The first step is to acknowledge that a collapsed drain could be the source of your drainage problems and will require immediate drain repairs to prevent further issues.


    Need help with a collapsed drain? Speak to an expert now:

    08081 689 112


    Here are seven signs to look out for.[/vc_column_text][/vc_column][/vc_row][vc_row][vc_column][vc_column_text]

    Collapsed Drain Sign #1: Damp

    The blockages caused by a collapsed drain will stop water from passing freely. In turn, this will almost always result in water escaping to reach the surrounding ground. This will often result in damp patches to the walls and floors.

    Alternatively, you may start to see cracks in your pipes. If located just outside the property, there could be fungus growth on the external walls too. While this is far from being the only cause of damp, this is a symptom where investigations will be required.[/vc_column_text][/vc_column][/vc_row][vc_row][vc_column][vc_column_text]

    Collapsed Drain Sign #2: Odours

    Bad smells can surface from your sinks for many reasons, so you’ll want to try flushing them first. Then again, if the odours keep returning there is probably a blockage rather than a simple build up of junk. Given that this is caused by damaged piping at one location or another, a collapsed drain is a very real possibility.

    If the smells come from several units around the home, there’s a strong chance that the issue is located further down the line. Alternatively, those odours may emanate from the outside drain covers.[/vc_column_text][/vc_column][/vc_row][vc_row][vc_column][vc_column_text]

    Collapsed Drain Sign #3: Slow Drainage

    When waste disposal starts to slow, there’s often a blockage of some kind. When this reduced performance occurs over an extended period, there’s a good chance that there’s a simple obstruction in the system.

    Conversely, a sudden change may indicate that there is a collapsed drain. After all, this will produce a far greater blockage than debris and other small materials. Again, an attempted flush of the system should remove accumulated materials. So if this doesn’t fix the issue, a collapsed drain will suddenly look far more probable.[/vc_column_text][/vc_column][/vc_row][vc_row][vc_column][vc_column_text]

    Collapsed Drain Sign #4: Sewage Accumulation

    Blockages are a common factor, particularly for poorly designed systems. Many homeowners subsequently have to deal with this as part of their property maintenance. However, it’s the frequency of those sewage backups that should concern you.

    Once again, a collapsed drain will accelerate damage growth due to the severe disruptions. If you feel that the sewage buildup has become a common problem for your household, this is a possibility that must be investigated ASAP.[/vc_column_text][/vc_column][/vc_row][vc_row][vc_column][vc_column_text]

    Collapsed Drain Sign #5: Grass Patches

    Collapsed drains can occur both in and outside of the property. Given that the leaking water can serve as fertiliser, this may result in vegetation growth in unexpected areas.

    Alternatively, you may find that some patches of your lawn suddenly start to grow in a different fashion compared to the rest. A more intense greenness is a particular trend to observe. As with many symptoms, collapsed drains are only one potential source of trouble. If linked to other signs, though, this could be the answer.[/vc_column_text][/vc_column][/vc_row][vc_row][vc_column][vc_column_text]

    Collapsed Drain Sign #6: Infestations

    Theoretically, it would seem that unwanted rodents or insects would be a sign that the pipes are flowing freely. However, sewer rats and other critters can squeeze through very small gaps.

    Collapsed drains can create access points, which may encourage them to enter your home. Infestations are a serious problem of themselves. So, seeking quick action for the potential drain collapse is essential. Otherwise, both issues could turn into very costly situations.[/vc_column_text][/vc_column][/vc_row][vc_row][vc_column][vc_column_text]

    Collapsed Drain Sign #7: Subsidence

    Water leakages caused by collapsed drains can cause some very serious problems. Subsidence is one of the most severe. A visible slump in the ground is only likely to appear after the problems have been left untreated for a long time.

    Collapsed drains are one of the leading causes. Therefore, if this symptom starts to show, it’s imperative that you locate and rectify the damage immediately. Leave it any longer, and the sinking could lead to a homeowner’s disaster.[/vc_column_text][/vc_column][/vc_row][vc_row][vc_column][vc_column_text]

    Whats Next?

    Once you’ve spotted signs of a potential drain collapse, it’s vital that you get it inspected at the earliest stage possible. Quick identification and reaction will allow you to minimise the damage and prevent further problems.

    Give BDS Drainage a call today to arrange a Drain Survey. We have specialists all across the Southeast of the UK that ready to diagnose your drainage issues, follow the below link that is relevant to you in order to speak to your most local drainage expert!

    Drain Surveys London | Drain Surveys Essex| Drain Surveys Kent | Drain Surveys Surrey

    Already Had Your Drains Surveyed? – Our Specialists Can Conduct The Repairs Quickly & Efficiently!

    Speak with a local specialist from BDS Drainage that can complete your repairs ASAP;

  • Cracked Pipes or Holes: Causes, Common Signs & How to Fix Them

    Cracked Pipes or Holes: Causes, Common Signs & How to Fix Them

    [vc_row][vc_column][vc_column_text]Your drainage pipes serve a crucial function for your home.

    Sadly, they aren’t invincible and can suffer various types of damage.

    Cracks and holes are the most common forms of disfigurement, and this can create major problems throughout the property.

    Therefore, it’s imperative that you are aware of the situation and processes needed to restore their health.

    Here’s everything you need to know in your bid to identify, manage, and repair cracked pipes and holes.[/vc_column_text][/vc_column][/vc_row][vc_row][vc_column][vc_column_text]


    Need help with cracked drains? Speak to an expert now:

    08081 689 112


    What Causes Cracked Pipes And Holes?

    Drainage and sewage pipes can encounter problems for a whole host of different reasons. In many cases, however, this is usually down to the fact they are exposed to the elements as well as your waste. That combination of materials can be lethal for the condition of those facilities, which is why wear and tear will show.

    Corrosion to the piping materials isn’t uncommon, particularly in systems that use outdated metals that wouldn’t be used in today’s climate. Underground movement can be a regular source of damage too. This can be caused by natural factors or problems with building foundations. The growth of tree roots can also pose a major threat to the condition of those pipes.

    One crack can often lead to further cracks due to compromised piping structures. Cracks can fall into several categories including lateral, longitudinal, and pipe fractures. Given that each situation is unique, the list of sources is nearly endless.[/vc_column_text][/vc_column][/vc_row][vc_row][vc_column][vc_column_text]

    How Can I Spot A Potential Problem?

    The fact that pipes are primarily hidden underground or behind walls can make it difficult to spot the damage. However, there are many symptoms that may start to appear in and around your property. Maintaining a watchful eye should help you notice the problem far sooner. In turn, this will enable the fast treatment needed to minimise the damage.

    Cracks will lead to water leaks and blockages, which is why you should look for the common signs. Foul smells can be a telltale indicator of a problem, with holes and cracks sitting among the most frequent. Meanwhile, the leaks can often lead to dampness, which results in cracked walls and floors.

    Wet patches either in or outside the home are another symptom that suggests damage. Sinkholes and subsidence also point towards quite a severe issue. While cracks and holes aren’t the only possibilities, they are quite likely. With this in mind, further investigation is key.[/vc_column_text][/vc_column][/vc_row][vc_row][vc_column][vc_column_text]

    What Are The Potential Solutions?

    First and foremost, you’ll need to confirm that cracked piping is the source of your troubles. With pipes hidden away, a professional touch is often the only solution that offers a thorough CCTV drain survey. Trying to take on this task yourself will often result in some aspects being overlooked.

    Once the issues have been verified, there are several options at your disposal. The most common include:

    Drain Relining

    Drain relining (or no-dig technology) is essentially a job where the cracks and holes will be sealed to prevent leaks without the need for replacing an entire section of the pipe. It is best used for cracks up to around 5ft and utilises a bladder, which is inflated to bind with the pipe’s internal walls.

    The barrier created ensures that the pipe will continue to work as good as new while causing minimal impact to the capacity of flow.

    Slip Lining

    Slip lining is an old method of trenchless pipe rehabilitation. Tubes are inserted into the structure of the pipe to create a new route for waste and water to flow. The tubing can be created in several materials and may come as one piece of several sections.

    This method makes the structure even stronger as leaks would have to escape two materials to cause future problems.

    Drain Excavation

    Minor cracks can often be fixed with modern tech in a non-intrusive manner. For severe problems, however, pipes will need replacing. In those situations, drain excavation is the only solution. This means digging into the ground to find the problem and replace the broken piping.

    It can cause a temporary convenience. Still, knowing that you have healthy and modern piping in place is very pleasing. Besides, it could save a lot more hassle in the long run.[/vc_column_text][/vc_column][/vc_row][vc_row][vc_column][vc_column_text]

    Who Can Fix It?

    Unlike some plumbing issues, cracked piping is a job that requires a professional touch. Here at BDS Drainage, our friendly experts can identify and fix those problems efficiently. If you’ve spotted those signs, even at their earliest stage, give us a call on 08081 689 112 (Freephone – CLICK TO CALL) to discuss your needs and book a survey.

    One way or another, we’ll get those drainage facilities back to their best in no time.[/vc_column_text][/vc_column][/vc_row]

  • What is No Dig Technology: Resurrecting your Drainage System with Drain Relining

    What is No Dig Technology: Resurrecting your Drainage System with Drain Relining

    [vc_row][vc_column][vc_column_text]Leaking drains are a serious household problem. Even the smallest of leaks can cause damage to building work and the foundations.

    In some cases, the increased waste may also lead to increased operational costs.

    However, this isn’t only one of the most frustrating faults to occur in your home; it can also be one of the most costly.

    That is, of course, unless you know how to avoid expensive treatments. Drain relining, also known as no dig technology, is often the perfect solution.

    It’s one that brings many benefits over some of the more traditional options. Here’s what you need to know about the process.


    Need help with drain relining? Speak to an expert now:

    08081 689 112


    [/vc_column_text][/vc_column][/vc_row][vc_row][vc_column][vc_column_text]

    What Is No-Dig Technology?

    In essence, drain relining (no-dig technology or trenchless) is a process that involves creating a new internal wall for the affected piping. This makes the system leakproof while sacrificing only a tiny percentage of the maximum flow levels. Better still, it does so without needing to replace the broken or faulty piping.

    Ultimately, this means that the procedure can save both time and money. Best of all, the project can be completed without the need to dig around in search of the broken parts. So, aside from being a better solution due to the direct benefits, there are plenty of indirect rewards to consider too. After all, nobody wants to be left with the clear up jobs that result from intrusive digging.[/vc_column_text][/vc_column][/vc_row][vc_row][vc_column][vc_column_text]

    How Are Drain Relining Processes Completed?

    Drain relining is a job composed of several stages. The first is to locate where the leak is occurring. The clear signs will give you a fairly accurate estimation, but you must pinpoint the exact location. Doing this without digging may seem impossible. Thankfully, modern tech allows us to investigate the drainage system with CCTV cameras.

    This step doesn’t only look for the source of the leakage. It also surveys the drain pipe to check the severity and size of the problem. Once this data is available, making a decision as to whether relining is suitable becomes easy. In many cases where the affected areas cover a space of centimetres rather than metres, relining is ideal.

    Before fitting the new piping wall, the surface needs to be cleaned with a high-pressure water jet. After all, the gunk and junk that has accumulated could make it difficult for the new lining to take. Frankly, this preparation part of the process is vital for the success.

    A new bladder is then inserted to cover the source of the leak. This is then inflated so that it can bond with the clean pipe surface to become a sealant. This creates a new internal wall for the pipe, stopping all leaks and preventing further damage to the previously affected area.

    Once the new bladder is in place, cameras will be used to check that the entire leak is covered. Moreover, we’ll test to see that water can flow through the fixed piping without disruption or leakages in other parts of the system.

    Upon completion, the drainage system will have been restored to its former glory without the need to dig up the land or replace an entire pipe. Perfect.[/vc_column_text][/vc_column][/vc_row][vc_row][vc_column][vc_column_text]

    How Long Does It Take?

    Many homeowners assume that the process of running a survey and then completing an intricate job would take an age. Surprisingly, though, the entire job can often be completed within a couple of hours. This includes every step from investigations to reviews.

    This is great news for the cost as well as the hassle. It’s not always the best process for faults in larger parts of the drainage systems. As for the leakage issues caused by smaller cracks and faults, though, it’s not hard to see why it’s so popular.[/vc_column_text][/vc_column][/vc_row][vc_row][vc_column][vc_column_text]

    Do I Need To Know Anything Else?

    The drain relining process isn’t only a great way to fix leaks. The CCTV surveys will spot building blockages, which can then be rectified before they turn into a serious problem. This is another fantastic reason to choose no dig tech facilities over alternative fixes.

    Assuming the relining process goes to plan, the results will last just as long as any normal pipework. So, it might eventually succumb to general wear, but it isn’t a short-term fix. Relining is a non-intrusive plumbing solution that is built to last.[/vc_column_text][/vc_column][/vc_row][vc_row][vc_column][vc_column_text]As for other enquiries, why not speak to us directly by calling today. Here at BDS Drainage, we’ll be happy to talk you through the process and discuss any questions you may have. But if you have a minor leakage in your drainage system, it’s safe to say that no-dig technology is an option worth considering.[/vc_column_text][/vc_column][/vc_row]

  • Sewer Rats: How to Get Rid of Rats in Drains

    Sewer Rats: How to Get Rid of Rats in Drains

    [vc_row][vc_column][vc_column_text]A rat infestation is one of the worst situations that could ever occur in your home.

    The rodents are only looking for food and shelter, but their diseases and general dirtiness makes them a huge health risk for the family.

    Moreover, they can cause damage to the property too. Therefore, finding a quick way to move them on is essential.

    The signs can vary from droppings, especially behind appliances, to sounds from the floorboards and wall cavities

    While there are several potential points of entry to consider, the drainage and sewer system is the most common by far.

    So, how can you stop this issue becoming a major cause for concern?

    Identifying the problem is a major breakthrough in itself. Follow this up with these steps, and you won’t go far wrong.


    Need help with rodents? Speak to an expert now:

    08081 689 112


    [/vc_column_text][/vc_column][/vc_row][vc_row][vc_column][vc_column_text]

    Fix Broken Drains

    Drain systems can suffer damage over the years. When the problems caused by cracks and chips are cosmetic rather than functional, it can be very tempting to ignore them. Likewise, you may dismiss underground faults. Unfortunately, if the home has become infested by rates, there’s a very strong chance that this is the source of your problems.

    The drainage system may have collapsed, or you may have an issue with the lining. A professional drain excavation may be the only answer. BDS Drainage can locate the source of those problems before repairing (or replacing) the affected pipework. This process may involve breaking the surface to find the damage too, but it is a far less daunting prospect that you probably fear.

    Once the water is no leaking, the drains can become a less attractive prospect for the rats. Moreover, new piping may be more difficult for them to enter too. Then again, your work shouldn’t end there.[/vc_column_text][/vc_column][/vc_row][vc_row][vc_column][vc_column_text]

    Install Rat Stops

    Given that work is already being completed on the drainage system, this is the perfect time to complete further upgrades. Installing rat stops systems will help prevent rodents from entering the home, even when they try.

    A rat stop is essentially a gate that will prevent rats from entering the property through your sewage system. Meanwhile, it will still allow water to flow freely. These can come in various designs including traditional gates and flaps that will only move in one direction. In either case, the pipe will still flow at almost full capacity.

    Unfortunately, you may not be able to stop rats entering the external sewage system. Blocking access to the home via the drainage facilities is the best outcome you can hope for. This is easily the best way to achieve it.[/vc_column_text][/vc_column][/vc_row][vc_row][vc_column][vc_column_text]

    Trap & Remove Current Infestation

    Sadly, the fact that you have already suffered from an infestation means that there may still be rats lurking in the drains. If they are beyond the newly installed rat stops, it’s imperative that you find a way to rid your home of those rodents too. There are many options at your disposal, but the key factor is that you act quickly.

    Traps are available in both lethal and non-lethal options. Alternatively, poisoned rat food can solve this current problem. In truth, different people will have varying views on the best way to handle the situation. Whatever happens, though, a speedy disposal is required. This step is best left to the professionals.

    Once you’ve successfully removed the rats that had entered the home and installed a stopper, the bulk of your problems will be over. Nonetheless, the stress and seriousness of this ordeal highlight the fact that you’ll want to go the extra mile to ensure it never happens again.[/vc_column_text][/vc_column][/vc_row][vc_row][vc_column][vc_column_text]

    Prevent Future Episodes Elsewhere

    As already mentioned, sewers are the primary root of rat infestations but aren’t the only one. Therefore, if you wish to combat the threat of repeat situations, it’s imperative that you consider those other aspects.

    Cleaning the affected parts of the home goes without saying. However, you’ll want to change your approach to food storage, feeding pets, and general tidiness around the home and garden. This can include avoiding organic foods for the compost heap and avoiding clutter in the home. Aside from minimising the appeal for rats, it can go a long way to stopping other bugs and critters too.[/vc_column_text][/vc_column][/vc_row][vc_row][vc_column][vc_column_text]A rat infestation will ruin your happiness around the home. The longer you leave the issues untreated, the more damage and health risks you’ll encounter. Whether it’s fixing problematic drains, removing rodents from the home, or preventing future episodes doesn’t matter. Acting immediately is a must, and BDS Drainage is here to help.[/vc_column_text][/vc_column][/vc_row]

  • 10 Tips for Saving Your Home From Flood Damage

    10 Tips for Saving Your Home From Flood Damage

    When flood water enters your home, the damage caused can be immense.

    No homeowner wants to find themselves in a situation like this, but it does happen.

    If you are dealing with this problem, there are some tips that can make things much clearer for you and help you to save your home.

    Read on to learn more about what you should do when your home has been affected by flooding.

    1. Turn Off the Power

    The first thing you should do is think about the safety of your home. If you don’t ensure that the power is off, and part of your home is flooded, there will be a major safety hazard, and it might end in disaster.

    So, you should always be sure to disconnect the power before you go any further. Nothing is more important than the health and safety matters such as this. It will put you in a position where you’re able to proceed safely.

    2. Move Fast to Remove the Water

    Once the first step has been taken, you need to start moving fast to get the water removed from the affected area of the home as quickly as you can.

    Manually removing the water is an option if all the power is off and you don’t have an alternative way of powering mechanical devices.

    This is a strenuous task, but it needs to be done. Wet/dry vacuums are also often used to suck up the excess flood water rapidly.


    Need help with flood damage? Speak to an expert now:

    08081 689 112


    For professional basement flood cleanup in London and the surroundings, give BDS plumbers a quick call on 02036 757 174 (CLICK TO CALL FROM YOUR MOBILE).  

    3. Contact Your Insurance Company

    You’re going to want to call up the company that provides your home and contents insurance cover as soon as possible. With so many things to do, this can often get forgotten about.

    But it’s always worth taking the time to notify them of what’s going on and what they need to be aware of.

    If you leave them in the dark for too long, getting your hands on the insurance payout you’re entitled to could become a lot harder for you and your family.

    4. Take Steps to Dry Out the Room

    Removing the water doesn’t mean that the affected area will be dry. Everything will still be drenched because some of that water will have been soaked up.

    That applies to the furniture, the carpets and the walls. Dehumidifiers are useful for drying out the area once the water has gone. And simple fans can be used as well.

    You want to salvage as much as you possibly can, but that’s only possible if you dry the area out as soon as you can.

    5. Steam Clean the Floor

    The padding of your carpets will have to be replaced if it’s been covered by the flood water. But that doesn’t necessarily mean that the whole carpet will have to be replaced.

    By steam cleaning the floor, you will be able to get rid of any of the dirt and bad smells that are lingering in the carpet.

    This is definitely worth doing because it’s a lot cheaper than having to completely replace all of the carpet that has been affected by the flood water.

    6. Scrub Away the Dirt

    You’re going to have to scrub hard to remove all the filth and grime that will be sticking to your home even after it’s been dried out. Flood water is not clean. So, when it enters your home, it will bring an awful lot of dirt with it.

    The best way to get rid of this residue is to use a scrubbing brush and soapy water to remove it. It’s hard work, but it really is the best way to get rid of any dirt that’s still hanging around after the above tips have been used.

    7. Destroy Bacteria by Using Disinfectant

    Even after the dirt has been removed, it’s possible that bacteria will still be lurking in the area hit by the flood water. That’s just how it is, and you might not even be able to notice it.

    That’s why it’s so important to make use of disinfectant. This will remove any of that dangerous bacteria that is still hanging around.

    Scrubbing along won’t get rid of it, so it’s important to make sure you don’t skip over this step.

    8. Prevent Mold Growth

    One of the dangers to be aware of when saving your home from the horrors of flood damage is mould growth. You can’t let this become an issue because it can be a real problem to deal with once it gets out of hand. There are mold control products that should be used. This will stop the problem in its tracks and make your life much easier as you try to get things back to normal as quickly as you possibly can.

    9. Check All the Furniture and Dispose of Any That Can’t be Recovered

    Not all of your furniture is going to be salvageable. Unfortunately, some of it will probably have to be thrown away. Of course, it depends on where the flood hit and which furniture was affected.

    Once you’ve got it out of the water and you’ve dried out the area, you should check all of your furniture that was impacted.

    You might be able to rescue some of it. But some items will inevitably have be disposed of in the correct way.

    10. Learn Lessons from the Experience

    Finally, you need to learn about how to prepare better for future floods. By having an action plan in place and improving your home setup, you might be able to avoid the worst of the damage in the future.

    Of course, you’ll hope that this never happens again, but hope won’t get you very far when it comes to keeping your home as secure and protected as it possibly can be. So, give this some thought.

    Flood damage is always a hassle to deal with, but by taking the right steps, you can get your home back to how it was sooner rather than later. So, keep these 10 tips firmly in mind.

  • The Importance of Water Pressure

    The Importance of Water Pressure

    We all use water in our homes, and we use it for a variety of different things. One thing is for sure: we certainly wouldn’t want our homes to be without it. But how strong is your knowledge of water pressure? And do you understand why it’s so important? Most people have heard of it, but they might not be so clued up on why it matters and what problems with water pressure in the home can lead to.

    This guide will let you know all you need to about keeping your water pressure at the correct level and avoiding the problems that can result from it being too high or too low. You can find out the basic information, some of the consequences you’ll want to avoid and the steps to take to put things right. So, read on now and start learning.

    What Is Water Pressure?

    Water pressure refers to the force with which water passes through your pipes and out of the faucet. It’s not hard to understand, but it’s important to make that clear before we go any further to look at the problems and issues that are associated with low or high water pressure. There are three units of measurement that are used when we’re talking about water pressure. These are bars, PSI and head. You don’t need to understand too much about them to understand why water pressure matters, though.

    What Do the Variations Mean?

    Water pressure is not just one of those things that matter to plumbers and people who are worried about how the water affects their hairstyle. It’s something that has direct consequences on lots of the things we all do each day. If the water pressure is too high or too low, you will experience problems and difficulties that should have to deal with. Even if you’re used to this problems, that’s no reason not to get them fixed. The variations matter a lot more than many people know. You can learn more about the precise consequences of having the wrong water pressure by reading on now.


    Need help with water pressure? Speak to an expert now:

    08081 689 112


    The Consequences of Low Water Pressure

    Slow Flow of Water

    When your water pressure is low, you will find that the water flow is slower than most people want it to be. This can be frustrating when you’re trying to take a shower and the water feels like it’s just dribbling out at an extremely low speed. It can also be annoying when you’re doing the most basic things in the kitchen. You will have to wait longer to complete tasks like filling the kettle up or washing the dishes in the sink. Most people don’t like waiting around for those kinds of tasks, so it can be pretty frustrating.

    Drop in Output When Two Appliances Are Using Water

    This is one of the problems that many people notice when they are having problems with low water pressure. For example, if someone is using the shower and another person in the home turns the kitchen taps on, the shower could experience a drop in output. This can be very annoying and frustrating. If you do experience this problem in your home, you should take action to stop the problem. It’s something that can be fixed, and many people don’t know that’s the case. Don’t feel like you need to put up with this annoyance any longer because it’s all linked to low water pressure.

    The Consequences of High Water Pressure

    Pipe Damage

    The most important thing to be aware of is pipe damage. Your high water pressure will strain your plumbing and pipes. This will inevitably lead to damage. This might not be something that happens instantly. Instead, it could be a cumulative effect, meaning the pipes will be worn down over time until, eventually, big problems are caused in your home. Nobody wants to deal with that. If you want to learn more about what kind of problems can be brought about by damaged pipes in your home, read on now.

    Leaks

    The pressure put on your plumbing system can be pretty immense when water pressure is too high. That’s something that you need to keep in mind because when your plumbing system is under too much pressure, it can lead to leaks as a result of the damage mentioned above. You don’t want to suffer the problems associated with leaks. It can cause damage to your home, and it can be a long time until you notice the problem. Those leaks are never fun to deal with, so be careful.

    Costly Wasted Water

    When water pressure is too high, as mentioned above, leaks are likely to occur. When that happens, you will end up using more water without actually using it. But you’re still going to be paying for that water. No one wants to be paying for things that they’re not even getting any use out of. But that’s what’s going to happen if your home has water pressure that’s simply too high. You can lose out on a lot of money, and that’s not something that too many people can afford to do. It’s one of the worst consequences of having high water pressure.

    What Can be Done to Fix Your Water Pressure Problem?

    If you are experiencing any of the problems mentioned above, it might be a sign that you have a problem with your water pressure. You should have it checked and then take steps to change things. You don’t need to just accept things the way they are when it comes to the water pressure in your home. Problems can be approached and fixed, and then you won’t have to worry about them again. Checking your internal plumbing and having any problems addressed is the first thing to do. Talking to the water supplier might be necessary as well.

    Water pressure certainly shouldn’t be ignored. If you do have any problems, get help and address them sooner or rather than later. That’s always the safe way to handle this kind of problem.

  • Does My Home Need a CCTV Drain Survey?

    Does My Home Need a CCTV Drain Survey?

    If you’re buying a new home, you need to know what you’re getting. This includes the home’s drains. If they’re not in good condition, this should be reflected in the price of the home. You might even want to get any problems cleared up before going ahead with the home purchase. There is nothing wrong with that, and it could save you money. That’s why more people are making the most of CCTV drain surveys.

    Anyone who’s still not sure whether to make the most of a CCTV drain survey should read on to learn more about this process. You can then make an informed decision regarding the drains of the house you’re about to buy. That could make a big difference to your house buying experience.

    What Is a CCTV Drain Survey?

    This is something that you might not have heard about before, but it’s pretty self-explanatory. A camera is lowered into the drainage system in order to gain a full picture of its condition. The drains can be examined comprehensively, and it can be decided if repairs or changes need to be made. A professional drain company will carry out this survey.

    This is something that become particularly useful if you are looking to purchase a home in the near future. It’s never wise to purchase a home until you have a complete picture of what condition it’s in and which improvements are required. It’s a type of survey that is becoming increasingly popular, and it’s not hard to see why. You can learn more about it by reading the information below.


    Need help with a CCTV drain survey? Speak to an expert now:

    08081 689 112


    Does Your New Home Really Need One?

    This is a question that you probably want an answer to. First of all, it’s important to make clear that this is something that is entirely up to you. Only you can make this call. However, drain problems can be difficult to fix, and they can be costly too. It’s always best to know about them before you commit to buying a house. If you don’t, you will just make more unnecessary problems for yourself.

    So, in short, you should be making the most of a CCTV drain survey. It allows you to know exactly what you’re getting. And it means that you won’t be in for any nasty surprises when the time comes to actually move into the home and start looking after it properly. It’s all about being clear and having that all-important peace of mind.

    Who’s Responsible for The Condition of Those Drains?

    When you’re buying a home, the seller relinquishes responsibility once the sale has been finalised. So, you can’t necessarily rely on the seller to ensure that the condition of the drains is up to scratch. It’s up to you to make sure that a survey is carried out. Many people don’t quite understand how all this works, especially if they’re buying a home for the first time.

    If you want to be sure that the home you’re buying has a drainage system that’s fit for purpose, you’re going to need to take action. It’s no use waiting for other people to take responsibility for issues like this. Only you care about the drains of the house you’re buying. Why would the owner who’s leaving the house behind care about things like that?

    What About if the Drains Are New?

    Many people assume that if the drains are relatively new, they don’t need to be checked using this method of examination. Unfortunately, that’s simply not true at all. There are problems that can affect drains at any time. No one wants to have to deal with damaged drains at any stage. But these things happen, and it’s not uncommon for new systems to be affected too.

    It’s not just about looking for signs of wear and tear. This kind of gradual damage takes time to emerge, but it’s not the only problem that is looked for when a CCTV drain survey is carried out. It’s just important to look for mistakes that were made when the drains were first fitted. This is why problems can even be found in newly built properties.

    Which Problems Are Commonly Uncovered by a CCTV Drain Survey?

    There are many things that can be found when a CCTV drain survey is carried out. Any of the common problems that pipes and drains can face can be found using this method of examination. If there is some kind of blockage or damage to the drains, this can be spotted very quickly, and then action can be taken to correct the problem.

    Root intrusions can be often be uncovered too. This is when roots from a tree or plant nearby intrude into your drains and start to cause problems. In the long-term, this can lead to cracks and fractures in the pipe, which in turn can lead to leaks. So, it’s important that issues like this are treated and dealt with sooner rather than later. That’s why a CCTV drain survey allows.

    Can it Prevent Further Drain Problems?

    Even if there is not a major drain problem in place right now, by having them checked and cleaned out, any potential problems can be stopped in their tracks. This is one good reason to have CCTV drain surveys carried out. It doesn’t have to be all about fixing problems that are there now because stopping them arising in the future can be just as important for you as a homeowner.

    Whether you’re in the process of buying a new home or not, the condition of your drains is important. By stopping problems from getting worse and causing you problems that are expensive to fix, you can save yourself money and prevent headaches. If you can stop those things happening, then it’s worth it. It’s something that you should have carried out regularly.

    This is an issue that can’t be ignored if you’re looking to buy a new home. You don’t want to be confronted with big drain problems later on, so consider a CCTV drain survey in advance.

  • Why Won’t My Hot Water Work?

    Why Won’t My Hot Water Work?

    Hot water is one of the many things that we all take for granted. When it’s there, we think nothing of it because that’s the way it should be, right? But when it stops working, it can feel like the world’s ending. Even if that characterisation is a little dramatic, it’s still pretty annoying when something we all rely on each day just isn’t there anymore. Tearing your hair out and get angry at your faucets won’t fix the problem or bring your hot water back, though. Instead, you need to find out why it’s not working.

    There are plenty of reasons why your hot water might not be working, and there are some steps that you can take to get to the source of the issue. Read on to learn about the steps that should be taken by you as a homeowner, as well as some of the common reasons for this headache.

    The Steps to Take When Your Hot Water Won’t Work:

    Examine the Water Heater

    The first thing you need to do is have a closer look at the water heater itself. This will help identify any obvious problems that might be causing the water to stop heating properly. Loose connections and obvious damage can cause this problem, so see if you can spot any evidence of that. These things can usually be fixed depending on the age and condition of the heater.

    Try to Kickstart the System

    Turning up the temperature as high as it will go could help to kickstart the water heater and get it working as normal once more. If you have an ageing heater, this can often be all that’s required. Of course, the same problem could arise again at some point. But for the time being, it helps you get your hot water on again, which has to make this trick worth trying once.


    Need help with hot water problems? Speak to an expert now:

    08081 689 112


    Look for Frozen Pipes

    If you’re experiencing these problems during winter when the temperature has already dropped pretty dramatically, it might be worth looking for frozen pipes. These are common causes of problems with your water heater. When the pipe freezes, it stops the entire system working properly. It’s hardly an ideal situation to be in, but by getting the problem fixed, you should be able to get your hot water back relatively quickly.

    Try Switching it Off

    This is one of those simple tricks that seems to easy and too cliched to possibly work. However, if nothing else is working for you, you definitely should try switching the system off. You can then leave it off for a few minutes or an hour. And then come back to it, switch it back on and see if anything has changed at all. You might be surprised to find that this is all that’s needed to get it working once more.

    Seek Professional Support

    If you are not having any luck with getting the bottom of the problem, it could be best to seek help from a professional who knows what they’re doing. If you have no plumbing background, it’s no surprise that you don’t know everything there is to know about water heaters. It can often be safer, quicker and easier to just get the right help from the right people. Otherwise, you might never get to the bottom of the problem. In this case call BDS Drainage and we can help.

    Common Reasons Why Your Hot Water Might Not be Working:

    Old Age

    Over time, your water heater takes a lot of wear and tear. It’s not a system that is going to get better as it gets older, as nice as that would be. Instead, it will slowly get worse, and some of its features might start to fail or its mechanics deteriorate. So, if your water heater is approaching about 10 years old, you should be looking to replace it anyway. Old age is the most common cause of people’s hot water not working.

    A Bad Thermostat

    Sometimes, thermostats can be the source of your problem. These regulate the heating of the water. In many cases, people forget that it has been turned down or turned off for whatever reason. They then wonder why the hot water isn’t working when they need it again. That’s why you should always check the thermostat first. It might also be broken and in need of some repair work.

    A Malfunctioned Timer

    If your heating uses a timer, it could simply be the case that something has gone wrong with that timer. This is a pretty small problem, and much easier to put right than some of the other issues your water heater could face. It could be as simple as resetting the timer. Sometimes, the clock can skip backwards or forwards, and that can lead to a situation wherein the water isn’t hot when you want it to be.

    Valve Problems

    When your problem is isolated to your water, meaning that the home’s central heating is working fine, it points towards a problem with your diverter valve. The valve might have become damaged or need replacing. It’s something to be aware of. It might also be the case that your valve float has got stuck, which can also lead to problems with your hot water. It’s not an ideal situation, but it’s relatively simple to fix.

    A Buildup of Sediment

    Your water heater is not going to just stay the same for as long as it’s in use. It experiences changes, and some of these can be damaging. For example, some of the contaminants found in the water that is stored in your heater can lead to a slow buildup of sediment. This can then harden and settle at the bottom of your water heater. Eventually, this could stop your heater from doing what you want it to.

    We all know that it can be pretty frustrated when your hot water just won’t work how you want it to. But keep a level head and do your best to get to the bottom of the problem. Only then will you be able to get things back in working order.