Author: BDS One base Media

  • Top 5 Plumbing Emergencies that requires professional plumber | Infographics

    Top 5 Plumbing Emergencies that requires professional plumber | Infographics

    [vc_row][vc_column][vc_column_text]At one point or another, most of us will come across a plumbing emergency at our homes. It is nothing but an uninvited trouble which can incite mental and physical pain and eat up your huge time and money if not handled properly. In addition, they can be a major embarrassment in front of your guests in the middle of your party or function. Taking pre-emptive measures will keep the trouble at bay, for instance, cleaning your kitchen drains regularly, insulating the going through the basement, so on and so forth.


    Need help? Speak to an expert now:

    08081 689 112


    These plumbing emergencies can surprise you anytime in the bathroom, kitchen sink, or in the toilet which can cause you major inconvenience if not diagnosed properly. You may enjoy taking up a DIY plumbing project but do not hesitate to seek professional help if you think it’s beyond your control, because it can cause major damage to your walls or expensive fittings.

    Having some plumbing tools like adjustable wrenches duct tapes, teflon tapes, at home is highly recommended as it can help you fix the problem temporarily until you find the permanent solution. Forced cup plunger and a plumber’s snake are another tools that will help you in case of blocked drains and toilets. In case of any major plumbing issue do call the nearest professional plumbing services at the earliest.[/vc_column_text][vc_single_image image=”8029″ img_size=”full” alignment=”center”][/vc_column][/vc_row]

  • How to Unblock a Clogged Shower Drain?

    How to Unblock a Clogged Shower Drain?

    None of us like to have dirty bathrooms and blocked drains in our house and prefer cleanliness and hygiene over anything else. But keeping up with our expectations of having clean shower rooms is not that easy. Often it is seen that people in the UK have complained about clogged drains and need to look out for services to clean the drains and save them the despair.

    Although cleaning and removing the blockage from the drains can be done through drainage expert service providers, we still need to know the small tricks which can save us the harassment of dealing with clogged drains at the first place.

    And so, before proceeding to the ways of unblocking a drain, we must know in brief about what causes the blockage and how we can prevent it from occurring. Let us know more about it below


    Need help? Speak to an expert now:

    08081 689 112


    What are the Causes of Drain Blockage?

    In most cases, the drain blockage occurs due to mishandling or improper maintenance of the drainage system. For example, people throw solid wastes in the shower or do not build a strong pipeline foundation when they make a drainage system. Also, the continuous usage of the shower essentials causes the clogs to double, like the soap scums or the skin flakes, etc.

    The hairs of both men and women still top the list of reasons of drain blockage as they are almost non-degradable and hence get stuck on the pipeline for a longer period. When you use a low-quality pipeline or do not take proper care and maintenance of it, the rusts also become responsible for preventing the water from passing moderately through the drain.

    Another very strong reason for less water inflow through the drain pipes is that the water strength is very low to push the wastes out of the pipeline. For that to stop, you must ensure heavy and strong water passage through the drainage so that it doesn’t clog the passage to entirety.

    How we can prevent it?

    The prevention of drain blockage includes not throwing such items in the shower which later on can create blockage problems. Also, one must focus on easy and simple techniques to carry on proper maintenance of the drains so that they don’t have to break their heads to find ways to unblock a drain.

    Ways to get rid of Blocked Shower Drains!

    If at all the drains of your shower gets blocked, here are some effective ways to get rid of it.

    • If you are comfortable with natural cleaning methods then you always have the option to opt for it. You might need a few natural substances like baking soda, boiling water and vinegar for the purpose. First, you need to pour the baking soda down the blocked drain followed by double the amount of boiling water. And then you should again pour baking soda, this time accompanied by vinegar of almost 1-2 cups. Also, ensure these mixes travel as far as possible so that they can naturally dissolute the clogs and free the drain of the blockage.
    • Apart from the natural means, there are chemical means through which the clogs can be removed. This is considered as one of the most common methods of sewer cleaning as because most of the times the blockage occurs due to the formation of heavy grease on the pipeline and when you use such chemicals or liquids that dissolute the grease, it becomes easy to get rid of the blockage faster.
    • Of late, the compressed air method has also become popular in and around the UK for unlocking the drains. The power and force that compressed air is comprised of have great ability to free the drain of the clogs that generally consists of hard wastes. When you know the compressed air through the opening of the pipe. It allows you to blow the accumulation of wastes to free the passage of water through the drain.
    • Much like the power of the air, we also know about the force of water and so, the option to use jet sprays for cleaning the drains of the clogs is also something that is preferred by the drain cleaners to unblock the drains.
    • When the blockage is not heavy and can be dealt with easily then you can use drain rods all by yourself to clean the garbage or solid wastes from the pipeline and make it free of the blockage.

    It is recommended that you opt for regular cleaning of the drains even if there is no sign of blockage as it ensures the prevention of blockages by a greater extent. Also, the natural means of cleaning must be carried out once a month or at least in alternate months to be sure of any kind of wastes accumulation on the pipeline. It is better to prevent the drains from getting clogged rather than finding ways to unblock it when it gets clogged.

  • 6 Tips to Prevent Pipes from Freezing | Infographics

    6 Tips to Prevent Pipes from Freezing | Infographics

    [vc_row][vc_column][vc_column_text]

    Frozen pipes are a major problem in homes located in regions with colder climates. A frozen pipe causes problems on multiple levels. Not only does it obstruct water supply but also increases the chances of a burst. A burst pipe needs extensive repairs and replacement and can cost hundreds of pounds, if not more. The infographic below touches upon a few answers on how to keep outside pipes from freezing.


    Need help? Speak to an expert now:

    08081 689 112


    That said, freezing is not limited to only pipes on the outside. There are cases where even pipes inside the home tend to freeze and burst. One way to get around this is by keeping the heat in your home turned on. This is important especially when you are away from your home for a week or more. But if you want a more energy-efficient way of preventing the pipes from freezing, consider investing in extra insulation. Insulation to prevent freezing is available in various forms. You can choose to install insulating sleeves for individual pipes or reinforce the walls that cover them. The measures outlined in the infographic below will help you prevent your pipes from freezing.

    However, if they do freeze or suffer a leak or burst because of the freezing, you can get in touch with us 24×7. BDS Drainage is a leading provider of plumbing services in London. We offer emergency plumbers in London who can help solve any problem with your drainage and plumbing system quickly and affordably.

     [/vc_column_text][vc_single_image image=”7979″ img_size=”full” alignment=”center”][/vc_column][/vc_row]

  • How to Waterproof Basement or Cellar Using Tanking

    How to Waterproof Basement or Cellar Using Tanking

    What Is Cellar Tanking?

    Cellar tanking (also known as Basement tanking) is the term used for the process of applying a waterproof layer that acts as a coating on the walls and floor of a cellar or basement. This waterproof layer acts as a water repellant that completely waterproofs your cellar, allowing it to remain dry when exposed to wet and moist conditions. Cellar and Basement tanking is a great way to waterproof your basement, If you ever decide to go through with a cellar conversion (or basement conversion).

    Cellar tanking makes your cellar waterproof, which is important if you want to use the room for any living activities. Tanking a basement reduces any negative health conditions you or your family may be exposed to if you plan on using your room for anything which will have people in there for long periods of time.


    Need help? Speak to an expert now:

    08081 689 112


    There are multiple ways on how to tank a cellar. Tanking slurry blocks have been described as one of the best and efficient basement tanking systems, as they block water and any other moisture from entering the basement, as opposed to other methods which only redirect the flow of water.

    BDS Drainage offers a premium cellar and basement tanking service. Visit our basement tanking London page today to arrange your free basement tanking valuation today.

    Why should you get Cellar Tanking?

    Cellar Tanking is a very important process that you should consider if you are thinking about investing in a basement conversion. It is extremely common to experience damp conditions in the basement/cellar of your home, especially in the seasons of the year where rain and the heavy downpour is common. The process on how to get rid of damp on the walls is a long and tedious one, which is why it is heavily recommended that you get cellar tanking as soon as possible. Tanking a Cellar acts as treatment, and a repellant for damp conditions, which is great if you have planned on using those areas of your home for practical reasons.

    The reason why your basement walls are so prone to damp conditions is that the walls of your basement/ cellar are below the level of the ground. This means that the moisture from the ground transfers through the semipermeable surface (the walls of your basement) in a process very similar to filtration or osmosis. Once the moisture has entered your basement, the walls get damp, which makes them the perfect breeding ground for fungi and bacteria. Conditions like this encourage the growth of mould in your property. Once the walls in your basement become damp, they become cold which allows the moisture in the air to condensate on the walls, creating wet walls, which also encourages mould growth.

    Having a basement conversion (cellar conversion) increases the immediate living space your property has, which allows you to do so much more with your home. But it’s important to always try and get the best standard of living you possibly can get. Basement Tanking allows you to enhance your home, without experiencing any of the health hazards that damp and mouldy conditions can put you though. Basement damp proofing is a great way to counteract these hazards, which will allow you to get the most out of your new cellar conversion.

    How does Cellar tanking work?

    There are multiple methods you can pursue when it comes to waterproofing a basement. The two options that are most common involve using a cavity drainage system, and basement tanking (also known as Cellar tanking). The method that we are going to explore in this post will be that of Cellar tanking.

    The aim of cellar tanking is to keep the basement or cellar as dry as possible but not allowing any moisture in from the outside. It also helps the cellar walls and floor remain warm enough to minimise any form of condensation, which will cause moisture to form on the inside of the basement.

    Basement tanking is known to be a prefered option compared to using a cavity drainage system when it comes to waterproofing a cellar. This is because it completely prevents water from entering, rather than just transporting the water to a different location.

    How To Mix Tanking Slurry

    When mixing tanking slurry, it is important to keep yourself protected at all times, as getting tanking slurry in your eyes can cause unwanted issues. The tanking slurry has a dangerous level of alkalinity, and when it’s in its powdered state, it is easy for it to make contact with your eyes and skin. Make sure you are wearing goggles, gloves, a full cover facemask and appropriate protective clothing. Do not inhale the tanking slurry powder either, as it may cause complications with your lungs.

    A high number of tanking slurries comes in a powdered state, which requires you to mix on site. It’s important to follow the manufacturer’s instructions when mixing the slurry, as each slurry has different requirements and prerequisites. Tanking Slurry, when not used becomes unusable after around 40-50 minutes, so it’s important to only mix an amount that can be used within this time constraint.

    When Tanking cellar walls, it is important to start by adding the necessary quantity of water to a good, sturdy mixing vessel. It is important not to use a cement mixer, as this does not get you the right texture of slurry for tanking cellar walls.

    Steadily add the slurry powder to the water in the mixing vessel, whilst you are mixing the water. Once the powder has been added, continue mixing for around 3 minutes using a plaster mixer, to give it a consistent rotation, giving you the desired texture. You should expect the texture of the slurry to come out like a batter like substance. Let the slurry set for approximately 1 minute, before remixing.

    Cellar/ Basement Tanking Process using tanking Slurry Explained

    Stage 1

    Prepare the surfaces

    The first stage of using the tanking slurry to waterproof a house involves preparing the targeted surfaces before any slurry is applied. You will also need to make sure there are no items obstructing the walls, so you’ll need to move all the items that may be obstructing your accessibility. This includes old dressers, shelves, wardrobes and other miscellaneous items.

    Once this is done, you will need to remove any plaster and other previous coatings such as paint, wallpaper, insulation etc. This should take you to the original wall (masonry), which is where the process of slurrying will start.

    Make sure there is no unwanted residue like dust, debris and make sure to fill in any existing holes you encounter. Doing this makes the process of applying the layers easier and means that you are less likely to encounter any issues when carrying out your basement tanking.

    It has been recommended that, if you have, or are experiencing any issues due to excessive levels of salt (from rain and the soil), that you should use a “salt inhibitor” on the afflicted areas. Salt inhibitors are additives added to mixes when applying plaster or slurry to a wall which has been affected by damp. The salt inhibitor acts as a remedial damp proofing solution, which helps hinder natural salts from compromising the basement tanking.

    Stage 2

    Observe wall for any seepages

    When you have stripped the wall of all materials, you’ll need to keep an eye out for any water or moisture seeping through the walls. If you notice any water seepage, or any other liquid or moisture seeping through the surface, then you will need to stop the flow by filling in the source.

    Stage 3

    Create a reinforced junction between the wall and floor

    When tanking a basement, it is always important to apply the basement tanking coating as if you were creating a completely waterproof and water resistant box that prevents water from coming into the cellar. It has been noted that from this waterproof box, the areas where the wall and floor create an angle are the weakest part of the coating.

    The best way to tackle the weaker areas of the slurry coating is to create a wall floor junction. The best and easiest way to do this is to:

    At the junction between the wall and floor, chase out the ground surface to a minimum of around 20mm x 20mm, cutting into the wall if you can. Flush the chase and remove any debris that is left over. Whilst the chase is still fairly damp, apply a single coat of basement tanking slurry around 100mm on the wall vertically, and the same across the floor. As the tanking slurry is setting, apply “Fillet Seal” over the slurry and chase you created, which should create a concave arch-like surface, spreading from the wall to the floor.

    Applying Cellar Tanking to a wall

    It is important to remember to apply your cellar slurry to surfaces which are damp, and to avoid applying it directly to a dry surface. If the walls in your basement or cellar are dry, make sure to make them damp. You could do this by spraying water onto the surfaces, make sure the wall isn’t dripping wet, however.

    With basement tanking slurry, it is recommended to use at least 2 layers of the slurry to get the best results. The first layer needs to be applied directly to the bare brick walls (masonry), and the second layer should be applied approximately 2-24 hours.before you apply this coat, however, it is important to make sure that the first layer is dry enough to be able to apply a layer on top of it without it peeling off. The layers should be applied on opposite strokes to the layer beneath ( first layer horizontal, second layer vertical). It is important that the second layer is applied within 24 hours of the first coating, even if the first layer still has a damp feel towards it.

    Applying Cellar Tanking to a Floor

    Applying cellar tanking (basement tanking) to a floor is similar, but a different process to applying it to a wall. It has been strongly recommended that you always tank the basement floor after you tank the basement walls.

    Applying slurry to the basement/cellar floor is similar to the walls, applying two layers and making sure you alternate the stroke direction between them. The main difference comes when you finish tanking a basement floor. It is always important to protect the basement tanking coating. This can be done by applying “floor screed” to the surface.

    Cellar Tanking Slurry Curing

    Once you have applied the second layer of the basement tanking slurry, it is important to let that layer cure properly. This process can take around 24 to 72 hours to fully cure. Sweating is a process that you may experience when allowing your slurry to dry. What this is, is water vapour condensing on the cold surface of the dry slurry. It’s nothing to worry about, it’s just something that can happen in regards to the amount of ventilation the basement or cellar has.

    Cellar tanking decoration

    Once you have applied and let your basement tanking slurry dry, you can now look to getting the room decorated. It is important to add a render to the basement 24 hours after the slurry dries before you continue with the decorations, however. We recommend using PermaSEAL tanking and PermaSEAL renovating plaster. Once the render coat has been added, you are now able to use plasterboard, and in some cases, a multi finish can be also used. Although you can, BDS Drainage and other credible sources do not recommend painting directly onto the tanking.

    BDS Drainage recommends that you avoid using any Gloss paints, wallpapers, and Vinyl emulsions, as these all can trap moisture underneath, which stops the basement tanking (cellar Tanking) from doing its job. This can cause further problems.

    How much does Basement Tanking Cost?

    Basement tanking costs do vary depending on multiple factors. One of these factors includes the size of the room you plan on tanking. Another factor that could affect cellar tanking costs could be the extent of the amount of mould that is currently present in your cellar or basement.

    PermaSEAL tanking slurry is an effective product that is highly recommended at BDS Drainage. It comes in 25 kg buckets and costs around £30-£35 depending on what type you get. With this amount, you can expect to cover around 12m squared. For a DIY basement tanking job, you are probably looking at a ballpark figure of around £500-£600. If you wish to enlist the help of a professional slacking company, contact BDS drainage today! Contact us today to receive a free basement tanking quote tailored to your property now!

  • All about the London Thames Tideway Tunnel Project

    All about the London Thames Tideway Tunnel Project

    [vc_row][vc_column][vc_column_text]

    The Thames Tideway Tunnel is easily among the most important civic projects taken up in the history of London. Also known as the ‘super sewer’, the Thames tunnel in London has been designed to accommodate the sewage that overflows into the Thames. The size of the tunnel has been a talking point among the London residents. Once finished, the tunnel is expected to be over 7 metres in diameter, 25 kilometres in length and up to 65 metres deep.

    The Thames Tideway Tunnel map (you can find the full map here) will chart a course that begins from Acton and stretches all the way up to Stratford’s Abbey Mills Pumping Station. More importantly, and this is where the engineering complexity of the London tunnel project becomes apparent, the tunnel will almost entirely be under the Thames river. It will also link to the other major London public works project, the Lee Tunnel. No wonder then that the Thames Tideway Tunnel news has been dominating the airwaves of late.

    [/vc_column_text][/vc_column][/vc_row][vc_row][vc_column][vc_single_image image=”7874″ img_size=”full”][/vc_column][/vc_row][vc_row][vc_column][vc_single_image image=”7875″ img_size=”full”][/vc_column][/vc_row][vc_row][vc_column][vc_column_text]

    Environmental experts agree the new London sewer will be a lifeline for the Thames, and the flora and fauna it is home to. Several million tonnes of sewage are released into the Thames almost every week, which has caused the river’s pollution levels to rise alarmingly.

    But how exactly will the Thames Tideway Tunnel project help? Why are things the way they are now? How much will this tunnel cost the taxpayer? For answers to those and many more questions, read on.

    Why does London need the tunnel?

    The new Thames tunnel is needed because the current system falls short of London’s requirements. The existing system consists of several sewer lines running underneath central London. Apart from regular waste water, storm water also drains into this system. This is mostly not an issue, except when there are very heavy rains. Heavy rains cause the sewer lines to become full quickly, thus leaving little to no space for regular waste water. But rather than flooding streets and entering homes, this waste water is channelled towards the Thames by an overflow mechanism.

    This overflow mechanism comprises close to 60 CSO (combined sewer overflow) sites through which excess sewage water flows into the Thames. These sites, and the entire London sewage system, date back to the Victorian era. Back then, the engineers expected the sewer system to overflow no more than 10-12 times in a year. Today, however, the system overflows into the Thames almost 60 times in a year. These CSOs do not just contaminate the Thames beyond acceptable limits but also put London in violation of the EU’s Urban Waste Water Directive.

    But why do the sewer lines overflow often?

    The reason for the frequent overflow of the sewers can be divided into two parts. Firstly, the amount of waste water flowing into sewer lines from London’s homes has been increasing over the years. Secondly, there has also been an increase in the amount of water that enters sewer lines during heavy rain.

    More waste water is a result of London’s increased population. Constructed in Victorian times, the London sewer system is capable of handling only half the city’s current population. However, there is also another aspect at work here. London has grown tremendously and extends over several new suburbs that use their own sewage systems, i.e. a growing population is only one reason for the increased overflows from London’s CSOs.

    The other reason is that London has been massively paved over in the last hundred years or so. This, along with disappearing green spaces and dried-up natural water streams, has led to a situation where very little water seeps into the ground. Earlier, it would take a really big storm for the water to enter the sewer lines and cause an overflow into the Thames. But now, even a mild spell of rain causes the London sewers to fill up quickly and run-off into the Thames.

    How will the new tunnel help?

    The Thames Tideway Tunnel route is designed to capture sewage from over 30 CSOs before it drains off into the Thames river. The discharge point of each CSO will be linked to the new Thames tunnel, which ensures the waste water will not end up in the river. After capturing the waste water, the tunnel under the Thames will pump it to the Beckton sewage treatment plant. The clean water obtained after treating the sewage will then be discharged into the Thames.

    Are there any other benefits to the Thames tunnel?

    London’s existing sewer system is of 19th century vintage. Its population back then was roughly two million. Today, the number of permanent residents in London has long crossed the eight million mark and the day where it becomes ten million is not far away. Simply put, the existing sewer system is not capable of dealing with the city’s sewage needs on its own.

    Moreover, the ill-effects of untreated sewage released into the Thames are manifesting in various ways with every passing day. Several hundred cases of pollution incidents are reported every year. It is not unusual for rowers and other recreational users of the river to complain of infections and illnesses because of the polluted water.

    The pollution also affects the river’s flora and fauna in a major way. The untreated sewage, especially during summer storms, can lower the water’s oxygen levels which can lead to thousands of fishes dying.

    This is where the Tideway tunnel comes in. By intercepting the sewage that would have otherwise ended up in the Thames, the London Tideway tunnel will lead to a cleaner and healthier Thames.

    The project is also generating a lot of jobs. More than 4,000 Thames tideway tunnel jobs are expected to be created directly. A cleaner and livelier Thames will also have a positive impact on the tourism industry. The local fishing industry will be another beneficiary of the project as the river will retain its status as one of the principal nursing areas for several North Sea species.

    It’d be safe to say that the Thames Tideway Tunnel project will affect the life of every Londoner in a meaningful way.

    How much will this cost?

    As one of the city’s largest and most complicated public projects, the Thames sewer is bound to cost a fair bit. The final Thames tideway tunnel cost is estimated to be around £4.5 billion. Thames Water, which is the company that fulfils London’s water and sewage treatment requirements, is passing on this cost to its customers. London residents can expect regular increases in their water and sewage bills up to the year 2020.

    However, Thames Water is not building the tunnel. Instead, it will be built by the Tideway Company. Thames Water, as such, will pay Tideway to build, operate and maintain the new Thames Tideway Tunnel.

    When will the tunnel be ready?

    The Thames Tideway Tunnel construction is already underway. The plan got regulatory approval back in 2014 while the finance for the project was secured a year later in 2015.

    The Thames tunnel construction itself began in 2016. The actual tunnelling work (using tunnel boring machines) started in 2017. Building the entire tunnel and other associated works is slated to be completed by 2023.

    BDS Drainage is a business that offers various drainage and plumbing related services in London. Over the years, as we helped clear blocked drains and execute projects that involved gutter cleaning in London, we often lamented how the city’s functional but old sewage system could use a nice shot in the arm. The Thames Tideway Tunnel is exactly that and promises a better future for London’s residents and the River Thames.

    [/vc_column_text][/vc_column][/vc_row]

  • How to Unblock a Drain

    How to Unblock a Drain

    [vc_row][vc_column][vc_column_text]Is your sink draining slowly? Or does a pungent smell come from your drains? Well, this may be due to a blockage of your drain. The outdoor drain pipe performs an essential function in transporting sewage and wastewater from your home to the sewer line. So, when this vital pipe becomes blocked, a lot of problems can surface. This post will help you understand how to unblock a sewage drain and identify the ways you can go about it.

    Blocked drainages are what most homeowners dread. Most people start by searching ‘how to unlock a drainpipe on every search engine or contacting an outside drain unblocker. But you should know that there are several DIY methods you can use to clear a blocked drain services. You will surely get your hands dirty and smell terrible things, but if it saves a couple of pounds in the process, then you should not turn your nose up at it (pun intended).


    Need help? Speak to an expert now:

    08081 689 112


    And if you are pondering on how to clean outside drains, then this is a guide you will find useful. Now, let us explore how to clear a blocked drain outside by yourself.

    “My outside drain is blocked!!”

    We get a lot of calls from frustrated people saying ‘My outside drain is blocked!’. But to unclog an outside drain by yourself, you would need to find out what the cause of the drain blockage was in the first place.

    It is important to do this because each drain blockage has a different cause. For example, kitchen sinks get clogged with grease, food particles or oil, for a bathroom it may be soap or hair, and a toilet drain can be blocked by something that seems so harmless like toilet paper.

    The drain outside the house is not exempted either. It may be blocked by soap, grease, domestic items or combinations of those items. Your leaves, silt, grease, dirt or other outdoor debris can cause your external drain to get blocked.

    So how does one decipher whether their outside drain is blocked by soil, mud, dirt or any other outdoor debris?

    Things You Will Need to Unblock the Drain

    Before we learn more about how to fix a blocked drain, there are a few things you’ll need for the purpose. These include,

    • Rubber gloves: Drains are dirtier than what you have imagined them to be. It is also as smelly as it is dirty, and that is why a good pair of rubber gloves would always be handy when going through a drain.
    • Rope: A rope is quite useful in removing a drain’s cover when you need to unblock a drain pipe.
    • Waste bags: Transporting the debris to the waste bins is also very important. That is why you will need some waste bags.
    • Drain rod: Another important piece in the ‘how to clear a blocked drain puzzle’ is the drain rod. They are used to dislodge a drain blockage and are available in local stores. You might want to get two or more, just in case something happens to the first.
    • Bleach: After clearing the blocked drains with your drain rods, it is necessary to clean up the drain. Bleach is an excellent outdoor drain cleaner, and it helps to remove the drainage smell as well.
    • Caustic Soda: Chemical drain unblockers are useful substitutes to the conventional manual process of unclogging a drain with a drain rod. However, you will never know when your blocked outside drain will require caustic soda, but homeowners use it as their last resort.
    • Garden Hose: After removing dirt from your drain, you may need to use water to clean it up more. Garden hoses will help you transport the water from the source to the drain.

    How to unclog an outside drain (Removing The Drain Cover)

    Remove the drain cover: Every outdoor water drain has a cover used to secure it. You could use a screwdriver or other strong metal tool to open it forcefully. Some covers have a handle for you to grab when removing them quickly. However, if the drain has been closed for an extended period, then it will be difficult to remove the cover. In those cases, you could use a rope to open the drain.

    • Take a look at what is happening inside

    When you take a look inside your drain and begin to ask yourself questions like ‘Should there be water in my outside drain?’. Then we have got a problem. If the chamber is holding water instead of draining it away, then you can conclude that somewhere after the drain chamber is clogged. Usually, a clogged soil pipe is the cause, but other things can also cause a blockage. But, there’s just one way to be certain. Search for a full chamber on a side and an empty chamber on the other side and when you find it that is the location of your blockage.

    • Use Drain Rods

    Manually using a drain rod is perhaps the best way to clear blocked drains. It is a useful outside drain unblocker tool that you can easily purchase in local stores or online. After locating the blocked chamber (which is where your blockage is), thrust the drain rods into this chamber until the blockage is removed. When pushing the drain rod, rotate it clockwise because this helps to dislodge the blockage properly. Nevertheless, try not to turn it anticlockwise because the plunger attachment may be unscrewed. Repeated thrusting of the rods will loosen the blockage and cause it to dislodge.

    • Clean all that is left

    Even after clearing the blocked external drain, there may be some debris that could lead to blockage again. Therefore, clean all that is left of the debris and blockage. An easy tip you can use is to water the debris. To check if the drain is now working correctly, open all taps in your house for a while. If the water is draining, then you have done an excellent job. Before you close the taps, put the drain cover back and pour a small amount of bleach into the drain. Bleach is an excellent outside drain cleaner as it removes all grease and muck, and removes the smell of the drain. A close substitute you could use instead of bleach is an external drain unblocker liquid that is readily available in local stores.

    While this process should rid-off most exterior drainpipe blockages, others might prove stubborn to remove. If you have such blockage in your drain, then it’s time to bring out to the big guns. Get in touch with our specialists if you are fighting a losing battle against your blockage, BDS Drainage operate all throughout the South East of the UK;

    External Drain Unblocker

    Caustic soda is one of the best chemical drain unblockers to use when unblocking a drain. After mixing, pour the solution in the outside blocked drain or any other place in the house where there is a blockage. It is that simple.

    Another alternative outside drain unblocker method that is available is to remove the drain pipe and thoroughly wash it with CCTV Drain Surveys to detect the problem. Also, you could contact a professional plumbing service if you do not feel capable of unblocking your drain alone.

    How to unblock an outside drain with caustic soda?

    Caustic soda is a useful external drain unblocker that can be bought at a low price from local stores. It is also an excellent chemical that is used to unclog outdoor drain systems. But how does this chemical unblock drains?

    Caustic soda is a very corrosive chemical. It will react vigorously with hair, dirt, food and any other material it comes in contact with. After the vigorous reaction, it will dissolve the debris leaving only particles behind. With the chemical having such destructive effect in indoor drains, it is quite obvious what it will do to the debris of an outside drain within minutes.

    Unblocking drains with caustic soda is simple, and can be carried by following these steps;

    • Dilute cups of caustic soda in a large bucket of cold water.
    • Stir the mixture of water and soda with a stirrer or wooden spoon. Do not use a metal spoon as the caustic soda will react with it.
    • As a precaution, do not utilise these stirrers or containers for cooking, other related purposes. Be cautious, and do not use your hand to stir the soda-water mixture.
    • As you stir and mix the two components, a fizz and heat should be noticed.
    • Next, pour the solution into the blocked outside drain
    • After a couple of minutes, the debris should rise to the top.
    • Remove the debris from the pipe and pour water to rinse the drain.

    Are you have trouble unblocking your drains with caustic soda? Contact us below for more help.

    How to clear a blocked kitchen drain outside?

    Kitchen drains are the most common drains in any homes to get blocked. Most people prefer to outsource the unblocking of these drains because of the debris they usually find in them. Nevertheless, you may still choose to unblock the kitchen drain yourself if the smell or dirt wouldn’t bother you. A few methods you can take unblocking your outside kitchen drain yourself are;

      • Pour water: Fat is the most common debris people find in their kitchen sink. When they solidify, they can cause a blockage. Pour a bucket of hot water into the sink to melt the blockage.
      • Use power washers: Power washers can be used to blast right through any kitchen blockage. But a power washer would not be useful if the obstruction is too deep down the sink or too strong.
      • Use baking soda: This chemical is one of the best methods in every ‘how to unblock waste pipe guides,’ and the reason is apparent. Baking soda is a natural, readily available and safe chemical for unblocking kitchen drains. Add a few cups of baking soda to vinegar and then pour down the drain. Leave the mixture for about thirty minutes, then pour boiling water. This should remove the blockage.

    Need help? Call our office and we can have a engineer out to you quickly at an affordable price.

    08081 689 112


    • Don’t use your hands: It sounds quite obvious, but most people do not know that an easy and effective way of removing clogs from the sink is by using a rubber-gloved hand. Do not forget to use your gloves because you wouldn’t want your hands to get dirty. Pour in some power wash later to remove the debris.
    • Use Caustic Soda: The should be your last resort before calling a professional if all other methods above fail. Make use of the chemical following the steps outlined above.

    How To Prevent Drains Clogging?

    You can ensure that the drain pipes outside your house do not get clogged by protecting the entrance of the following into the drainage system;

    • Fats, oils & grease (FOG)
    • Nappies & pads
    • Wet wipes
    • Applicators, tampons & wrappers
    • Sanitary products
    • Condoms
    • Bandages & plasters
    • Razor blades
    • Medicines & syringes
    • Dental floss
    • Hair
    • Cotton buds

    Best Drain Unblockers

    Some drain unblockers with the best reviews on Amazon include;

    • Caustic Soda Powder
    • Buster Bathroom Plughole Unblocker
    • Hair Grease Remover for Drains
    • Hg Liquid Drain Unblocker
    • Mr Muscle Kitchen and Bathroom Drain Gel

    We will take no responsibility for the failure or success of the products we have listed above. They have only reviewed highly rated by customers on Amazon. (We highly recommend that you call us to get the best drain unclogging service that you can get).

    You could also buy a drain-screener or a drain-gate which blocks debris like scum, food particles, soap, and grease going down the drain. Lastly, ensure that your pipes are frequently cleaned. Once in a while, pour hot water, drain cleaners or even some detergent down the drain. As simple as this routine task is, it will keep the drain clog-free and clean for several years. You may also use bleach to keep the sink smelling fresh. Minimising the debris that gets into the drains helps to decrease the possibility of outside pipes from getting clogged.

    Always keep in mind that prevention is better than cure. It is better to do that the things that you can prevent than to pay a lot of money and still get the same effect.

    Lastly always use a professional if you are unsure on how to unblock a drain and need a professional drainage company then feel free to contact us today for more advice:

    [contact-form-7 id=”6″ title=”Contact form 1″]

    Not Sure Where Your Drain Blockage Is? – It Might Be Time For A CCTV Drain Survey!

    Our specialists can diagnose your drainage problems using state of the art drainage camera equipment, call us today for;

    CCTV Drain Surveys London | CCTV Drain Surveys Essex | CCTV Drain Surveys Kent | CCTV Drain Surveys Surrey 


    how to unblock a drain

    Blocked Drains London | Blocked Drains Kent | Blocked Drains Surrey | Blocked Drains Essex

    [/vc_column_text][/vc_column][/vc_row][vc_section disable_element=”yes”][vc_row el_class=”blog-popup”][vc_column][vc_column_text]

    [/vc_column_text][/vc_column][/vc_row][/vc_section]

  • How to Unblock a Drain Using Caustic Soda?

    How to Unblock a Drain Using Caustic Soda?

    Although fairly common, a blocked drain is enough to drive most people to their wit’s end. An obvious recourse in such cases is to call on the plumber and while that’s a sensible option, there are certain things that you can do yourself to unblock a drain.  The vast majority of blocked drains are caused by jammed up debris like hair, food particles and other unwanted materials. Natural drain cleaners are often ineffective at removing this debris completely, which means chemical-based cleaners are your best option. Here we look at one such cleaning agent, caustic soda, and how to use it to unblock drains in your house.


    Need help unblocking your drain? Speak to an expert now:

    08081 689 112


    What is caustic soda?


    The chemical name of caustic soda is sodium hydroxide (NaOH) and it’s also known as lye. The name caustic soda is derived from the material’s origins as a sodium hydrate and it’s called caustic because, well, it’s highly corrosive in nature. It’s the last bit that is of most interest when we talk of unclogging blocked drains.


    Caustic soda causes a chemical reaction when it comes into contact with organic materials like dirt, food, hair etc. These are also ingredients that account for a majority of drain blockages. Caustic soda can also be easily dissolved in water, which is one reason why many drain cleaning services use it as the first line of offence in the battle against blocked drains. Commercial grade cleaners, however, have a higher concentration of caustic soda compared to the ones meant for domestic use.


    How to use caustic soda for cleaning & unclogging drains?


    In its purest form, caustic soda is available as a white coloured waxy solid. However, it’s the powdered or liquid form that is used for clearing a blocked drain. You can buy powdered/liquid caustic soda at any neighbourhood hardware store. Once you’ve bought it, follow the below-explained steps.


    • Take a large bucket and dilute 3 cups (750 ml) of caustic soda in 3 litres of cold water.
    • Use a wooden spoon or stirrer to mix the soda and the water.
    • Do not use these containers and utensils for any cooking-related purpose later on. Also, avoid using your hands to stir the mixture.
    • As you mix up the two, you should see a bit of fizz and some amount of heat.
    • Now pour this solution straight drown the blocked drain and let it sit undisturbed for 30 minutes.
    • Now boil 4 litres of water and use it to flush the drain.
    • If the block persists, you can repeat this procedure a couple of times.


    Considerations when using caustic soda


    Although highly effective, using caustic soda to clear blocked drains is not without its share of challenges. The biggest risk it poses is to your health and safety. Caustic soda’s corrosive nature, while a boon when trying to get rid of difficult blockages, can lead to vision impairment. At the very least, direct contact can create a burning sensation and swelling in the eyes and the skin. The consequences of ingesting it are far more serious. From chemical burns to gastrointestinal ulceration and even death, caustic soda’s effects on health can be devastating. If you have decided to use caustic soda to clear a blocked drain, do so after wearing full protective equipment. When you are done using the caustic soda, secure it properly and store it out of the reach of children.


    You can procure caustic soda from most hardware shops or stores that specialise in selling commercial-grade cleaning products. The concentration of the caustic soda sold by these stores ranges from 50% to above. However, you don’t need such a high concentration to dissolve the average drainage debris. But if you still intend to buy highly concentrated caustic soda, be careful of its corrosive nature and use and store it appropriately.


    If you are faced with a blocked drain, do not go for caustic soda as the first measure. Most drain cleaning products contain just enough caustic soda to get the job done. Periodically using these products is more than adequate to keep your drains flowing freely. Having said that, do consult a professional plumber once before buying high concentration caustic soda if conventional drain cleaning products fail to clear your drain blockage. Often, the risk of using something like caustic soda far outweighs the price you’d pay for a professional and efficient plumbing service.

    Caustic Soda method didn’t work? – Call our Drain Unblocking Specialists Today!

    Drain Unblocking London | Drain Unblocking Essex | Drain Unblocking Kent | Drain Unblocking Surrey


  • 4 Ways to Prevent Blocked Drains | Infographic

    4 Ways to Prevent Blocked Drains | Infographic

    [vc_row][vc_column][vc_column_text]Blocked drains are the bane of many a household. When the drain in your kitchen (or any other space) gets blocked, it can be a nightmare. However, there are ways in which you can prevent such an eventuality for your drain.

    For starters, understand that your drain is not a dump where every non-solid waste can be thrown. Which means you must avoid discarding stuff like cooking oils, fats, and grease into your drains as they can seriously jam it up. It’s well-known that more than 75 percent of blocked drains are the outcome of dumping grease and other similar stuff into the drains. Your drain is built to carry only waste water out of your home, and nothing else.


    Need help unblocking your drain? Speak to an expert now:

    08081 689 112


    Probably the cheapest way of maintaining the health of your drain, a drain strainer is a device that restricts prohibited items from entering your drainage system and creating blockages. Also known as a drain screen or drain gate, the device is available for a variety of sink types and sizes and is a must-have for all households.

    You can also avoid the formation of a drain blockage by regularly cleaning your drains. Just simple things like removing stuff like hair and other debris from the drain every now and then can prevent blockages. Using baking soda and flushing it down with a bucket full of steaming hot water gets rid of sticky debris. Doing these things ensures your drain remains devoid of odour and flows freely.

    Finally, never shy away from getting professional help when things go bad. Your drainage system is a complicated piece of plumbing that is not really ripe for DIY. Moreover, there are loads of professional plumbing services that offer a maintenance option which ensures your drainage system is checked for anomalies and problems regularly. While this might sound like an expensive proposition, remember that you’ll end up paying a lot more in case you need to fix a full-blown drain blockage.

    [/vc_column_text][/vc_column][/vc_row][vc_row][vc_column][vc_single_image image=”7740″ img_size=”full” alignment=”center”][/vc_column][/vc_row]

  • 8 Ways to Prevent Your Toilet from Getting Blocked

    8 Ways to Prevent Your Toilet from Getting Blocked

    A clogged toilet is the stuff of nightmares. What’s surprising though is the number of households where the toilet keeps blocking even after remedial action has been taken. And while it’s understandable that a majority of people are scared of messing around with their home’s plumbing system lest something goes wrong, there is a lot that one can do to prevent the toilet from getting clogged. As they say, prevention is better than cure. Which is why the best way to ensure human waste or sewage is sent packing as usual from your home is to maintain your toilet.

    Regularly maintaining your toilet is important as it’s arguably the most used (or abused?) fixture in your house and can cost a bomb in repairs if something goes wrong. Not to mention how messy and icky the whole thing can get. The tips outlined below help you avert such an eventuality and keep your toilet flushing merrily for years to come.

    Use a mild cleaning agent to regularly clean your toilet


    Need help unblocking your toilet? Speak to an expert now:

    08081 689 112


    Baking soda, soap, or even vinegar are some good easily available mild toilet drain cleaner options you can consider. Regular cleaning using such toilet flush cleaners keeps your toilet hygienic and better-smelling. A clean toilet also puts you in a better position to spot any problems (like a leak) with its plumbing.

    Avoid harsh chemical cleaning agents to unblock your toilet

    Using a chemical-based cleaner can get you mixed reactions from plumbers; while some advocate it, others are vociferously against it. That said, it’s best to avoid them as they can cause you harm in case of contact with skin or inhalation. Moreover, some of these products can damage fixtures or pipes that are a decade or older.

    Check your toilet’s internal mechanisms

    Doing this at an interval of about six months is an excellent way to ensure all components are working well and in top shape. It’s so simple that anyone in your family can do it. All you need to do is lift the tank’s lid up before flushing the toilet. Now watch if every component is functioning as it should; like if the fill valve pauses at the right water level or if the flapper seals as it should. A toilet that flushes the way it’s supposed to has a low chance of suffering a blockage.

    Avoid placing a brick in the tank to save water

    Modern toilets are exceptionally frugal when it comes to using water during a flush. Unless yours is really old (of mid-90s or earlier vintage), a toilet uses no more than 1.6 gallons, or just over 6 litres, of water per flush. Anything lesser and sewage systems won’t be able to move all the waste as effectively. Loading a brick in the cistern to save usage of water can cause the brick to disintegrate and lead to a blocked toilet.

    Teach your children how to use the toilet the right way

    Educating kids on how to use a toilet the right way is easiest when they are potty trained. That said, you can educate even older children on what to flush and what not to flush. Helping them understand their toilet paper usage and how to clean the toilet in the right way can go a long way in preventing blockages. By doing so, you are also instilling life skills in your children that will hold them in good stead once they move out on their own.

    Revaluate your toilet paper usage

    There are as many types of toilet paper as people. Okay, that might be an exaggeration but you get the point, right? And even though you may prefer the feel of your cushy super-soft toilet paper, chances are that your septic or sewage system doesn’t (especially the septic system which has enough stuff to degrade already without having to deal with imperishable toilet paper as well). This is a bigger problem with homes that connect to the municipal line through a lateral line as the toilet paper blocks sewage pipes, thus leading to backups.

    Buy and learn the uses of a flange plunger

    Probably the cheapest toilet unblocker of all, most people are surprised what this seemingly ancient tool can do along with a bucket of steaming hot water. While keeping an auger or drain snake at hand can be useful, the plunger would prove itself more than adequate for the vast majority of toilet blockages.

    Get professional help when it’s needed

    Your natural inclination towards DIY notwithstanding, remember that some tasks are just too complicated to manage on your own. If the toilet gets blocked repeatedly or if you see brown or brackish water backing up into the sink or the shower every time you flush, it’s a sign of something serious and needs proper attention from a professional plumber.

    The answer to how to unclog a toilet lies in maintaining it regularly. These are run of the mill things that you can teach everyone in your family. Remember, toilets are sturdy and durable devices and can last a lifetime (yes the porcelain too) if cared for well.


    ways to prevent your toilet getting blocked

  • What are French drains and why do they matter?

    What are French drains and why do they matter?

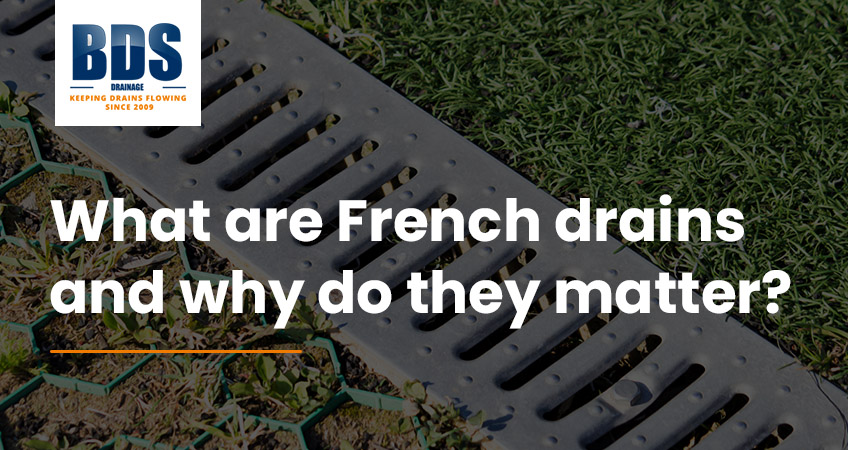
    Ever wondered why your garden turns into a mini lake every time it rains? Or perhaps you’ve noticed water pooling around your property’s foundation—pooling water and even dampness can be clear signs of water issues—making you nervous about potential damage? These problems are often caused by excess water accumulating where it shouldn’t. The solution might be simpler than you think—and it’s been around for centuries. French drains are one of the most effective yet underappreciated drainage solutions available, and understanding what they are could save you thousands in water damage repairs.

    French drains aren’t actually French (plot twist!); the system is named after Henry French, who popularized the method. They’re incredibly effective at solving water management problems on your land or around your building’s ground. Whether you’re dealing with a soggy garden, basement flooding concerns, or surface water issues, these clever drainage systems work quietly behind the scenes to redirect water away from where you don’t want it, protecting the building and its foundation. Before choosing a solution, it’s important to first establish the cause of your water issues.

    At BDS Drainage, we’ve installed countless French drains across London and the South East, and we’ve seen firsthand how transformative they can be for properties plagued by water woes. French drains are a form of land drainage designed to manage water on your property.

    A brief history of French drains

    french drain installation

    Despite their name, French drains weren’t invented in France. They’re named after Henry Flagg French, an American lawyer and farmer who popularised the technique in his 1859 book “Farm Drainage.” French wasn’t the first person to dig trenches and fill them with stones—ancient civilisations were using similar methods thousands of years ago—but he was the first to write comprehensively about the system and its benefits.

    The basic principle has remained largely unchanged since French’s time: dig a trench, fill it with graded materials, and let gravity do the work. What has evolved is our understanding of materials, gradients, and installation techniques. Modern French drains use sophisticated geotextiles, carefully graded aggregates, and perforated pipes to maximise efficiency and longevity.

    How French drains work

    The beauty of a French drain lies in its simplicity as a form of drainage solution. At its core, it’s a gravel- or stone-filled trench that intercepts and redirects surface and subsurface water. The system relies on two fundamental principles: gravity and the path of least resistance.

    french drain diagram

    When water encounters a French drain, it flows into the gravel or stone because it’s easier to move through the loose aggregate than through compacted soil. The perforated pipe, which is laid at the lowest point of the trench, has holes typically facing down to maximize collecting water from the surrounding ground. This pipe channels the water away to a suitable discharge point—perhaps a storm drain, soakaway, or lower area of your property—ensuring the area is properly drained.

    The typical French drain consists of several key components working in harmony. The trench itself, usually between 150-300mm wide and 300-600mm deep, houses a perforated drainage pipe surrounded by a layer of graded gravel or stone aggregate. The trench is lined with a geotextile filter membrane, which wraps around the gravel to prevent soil infiltration and clogging while allowing water to pass through. This geotextile filter membrane is crucial for maintaining efficient drainage and preventing debris from blocking the system. Finally, the surface is backfilled with topsoil and can be seeded or landscaped to blend seamlessly with your garden.

    Benefits of installing a French drain

    French drains offer numerous advantages that make them a popular choice among drainage experts and property owners alike. The most obvious benefit is efficient water management—they excel at preventing water accumulation around foundations, in basements, and across lawns or driveways.

    Property protection is another significant advantage. By directing water away from your home’s foundation, French drains help prevent costly structural damage, basement flooding, and soil erosion. To ensure effective drainage, it is crucial to maintain the correct slope—typically at least a 1% gradient—so water flows properly to the discharge point. They’re particularly valuable in areas with clay soils or properties situated on slopes where surface water naturally flows towards buildings.

    From an aesthetic standpoint, French drains are practically invisible once installed. Unlike surface drainage systems that can interrupt landscaping, a properly installed French drain disappears beneath your lawn or garden, maintaining your property’s visual appeal while working continuously in the background.

    Common applications for French drains

    french drain in garden

    We install French drains in various scenarios across residential and commercial properties. One of the most common applications is foundation drainage, where the system intercepts groundwater before it can accumulate against basement or foundation walls. This is particularly crucial in areas with high water tables or clay soils that don’t drain naturally, as the ground conditions can lead to excess water buildup.

    Garden and lawn drainage 

    If you’ve got areas where pooling water consistently appears after rainfall, creating muddy patches or killing grass, a French drain can transform these problem zones into usable space by collecting water from the ground and directing it away. We’ve helped countless homeowners reclaim soggy corners of their gardens using this technique.

    Commercial applications 

    Examples include car park drainage, where French drains manage surface runoff from large paved areas, and agricultural settings where they prevent waterlogging in fields or around farm buildings. In these cases, proper land drainage is essential to protect both the land and the building structures from excess water. Sports facilities also benefit from French drain installation, ensuring playing surfaces remain usable even after heavy rainfall.

    When planning installation, it’s important to position the French drain at the lowest point of the area to ensure effective drainage. Unlike a pit or other simple drainage methods, a French drain uses a gravel-filled trench with a perforated pipe to efficiently collect and redirect excess water.

    The installation process explained

    installation of french drain

    Installing a French drain is a construction task that requires careful planning and execution to ensure optimal performance. The process begins with a thorough assessment of your property’s drainage needs, including identifying water sources, determining appropriate gradients and slope, locating existing piping to avoid damage, and selecting the best discharge location.

    Digging is the most labour-intensive phase, requiring precise trenching at the correct depth and slope—typically a minimum fall of 1:100 to ensure adequate water flow. The trench must be carefully shaped to accommodate the pipe and surrounding aggregate while maintaining structural integrity.

    Material selection is crucial for long-term success. We use high-quality perforated pipes, which are laid at the bottom of the trench, a layer of graded aggregate that won’t clog over time, and durable geotextile fabrics for lining the trench to prevent soil migration. The installation sequence—pipe placement, aggregate backfill, fabric wrapping, and surface restoration—must be executed correctly to ensure the system functions as designed.

    Maintenance requirements for French drains

    french drain expert install

    One of the appeals of French drains is their relatively low maintenance requirements. However, like any drainage system, they benefit from periodic inspection and care to maintain optimal draining performance and to prevent clogging.

    Annual visual inspections of surface areas can help identify potential issues before they become major problems. Look for signs of settlement, surface water pooling where it shouldn’t, or unusually wet areas that might indicate system blockage, clogging, or failure.

    Every few years, it’s worth having a professional assessment to ensure the system continues functioning correctly. At BDS Drainage, we can perform CCTV drain surveys of the pipe network to identify any blockages, clogging, root intrusion, or structural issues that might compromise draining performance.

    Preventive measures include keeping the discharge area clear of debris, avoiding driving heavy vehicles over the drain route, and being mindful of what you plant nearby—some trees and shrubs have aggressive root systems that can infiltrate and block drainage pipes.

    DIY installation versus professional expertise

    While French drain installation might appear straightforward, successful implementation requires expertise that goes beyond basic DIY skills. Before attempting installation, it is important to seek expert advice to ensure proper planning and avoid costly mistakes. Incorrect gradient calculation, poor material selection, or inadequate excavation can result in a system that fails to function properly or, worse, exacerbates existing drainage problems.

    Professional installation by drainage experts like our team at BDS Drainage ensures your French drain is designed and built to last. We understand local soil conditions, regulatory requirements, and the nuances of effective water management. Our experience means we can anticipate potential problems and design solutions that work reliably for decades.

    The cost difference between DIY and professional installation often evaporates when you factor in the tools, materials, and time required, not to mention the risk of having to rebuild a failed system. 

    As a company committed to high standards and customer satisfaction, BDS Drainage offers a comprehensive French drain installation service. We can assist with every step of the process, from planning to installation, and provide a full range of services for both residential and commercial drainage solutions. Professional installation also comes with guarantees and ongoing support that DIY projects simply can’t match.

    Common issues and their solutions

    Even well-installed French drains can experience problems over time. Blockages are perhaps the most common issue, typically caused by sediment accumulation, root intrusion, or improper material selection during installation. Regular maintenance and professional cleaning, including high pressure water jetting, can fix most blockage problems efficiently.

    Root intrusion becomes more likely as trees and shrubs mature near the drainage system. Strategic plant selection during landscaping and root barriers during installation can prevent this issue. When roots do infiltrate the system, professional clearing and pipe repair may be necessary to fix leaks, often with minimal disruption to your property.

    Settlement can occur if the trench wasn’t properly compacted during installation or if inappropriate materials were used. This might manifest as surface depressions or reduced drainage efficiency. Professional assessment can determine whether repair or replacement is the most cost-effective fix, ensuring minimal disruption.

    Environmental benefits of French drains

    french drain benefits

    French drains offer significant environmental advantages that extend beyond simple water management. By controlling surface runoff, they reduce soil erosion and prevent sediment from entering waterways—a major benefit for local ecosystem health.

    These systems also help manage stormwater naturally, reducing the burden on municipal drainage infrastructure during heavy rainfall events. This is particularly valuable in urban areas where impermeable surfaces create significant runoff volumes that can overwhelm traditional drainage systems.

    French drains can be integrated with sustainable drainage systems (SuDS) to create comprehensive water management solutions that benefit both individual properties and the broader environment. They represent a low-energy, passive approach to drainage that works with natural processes rather than against them.

    Comparing French drains with alternative solutions

    Surface drainage systems

    Channel drains and gullies, are one form of drainage solution and offer different advantages and limitations compared to French drains. Other forms include filter drains, rock drains, and weeping tiles, each designed to remove surface or subsurface water in specific situations. While surface systems handle large volumes of water quickly, they’re more intrusive visually and can be damaged by vehicles or maintenance equipment.

    Soakaways

    Soakaways are particularly effective in areas with permeable soils. However, they require more space and aren’t suitable for all soil types. French drains, along with filter drains, rock drains, and weeping tiles, can often work where soakaways fail, making these forms more versatile for challenging drainage situations.

    Traditional surface water management systems

    Improved guttering or surface grading, might solve minor drainage issues but often proves inadequate for significant water management challenges. French drains and other forms like filter drains, rock drains, and weeping tiles provide more comprehensive, long-term solutions for properties with persistent drainage problems.

    Recent innovations in French drain technology

    Modern French drain installation benefits from several technological advances that improve system longevity and performance. Advanced geotextile materials offer better filtration characteristics while maintaining long-term durability, even in challenging soil conditions.

    Improved pipe materials, including high-density polyethylene options with enhanced perforation patterns, provide better water collection and flow characteristics. Some systems now incorporate inspection chambers and cleanout access points that simplify future maintenance.

    Design software allows drainage engineers to model water flow patterns and optimise system layouts before installation begins. This technological approach reduces guesswork and ensures systems are properly sized for their intended applications.

    Understanding the investment required

    French drain installation costs vary significantly based on factors including system length, excavation difficulty, site access, and material specifications. Generally, professional installation represents excellent value when compared to the potential costs of water damage or property remediation.

    Material costs typically include perforated pipe, graded aggregate, geotextile fabric, and surface restoration materials. Labour costs reflect the skill and time required for proper excavation, installation, and finishing work.

    When evaluating costs, consider the long-term benefits: reduced risk of structural damage, improved property usability, and increased property values. Many property owners find that French drain installation pays for itself through prevented damage and enhanced property enjoyment.

    To get started, you can easily request a quote or consultation for your drainage needs using our contact form.


    Frequently asked questions about French drains


    How deep should a French drain be?

    French drain depth varies based on application, but typically ranges from 300-600mm deep. Foundation drainage systems might require greater depths to intercept groundwater effectively.

    Can French drains freeze in winter?

    Properly installed French drains rarely freeze because they’re below the frost line and moving water is less likely to freeze than standing water. However, discharge points should be designed to prevent ice blockages.

    How long do French drains last?

    Well-installed French drains using quality materials can function effectively for 50+ years with minimal maintenance. The key is proper initial installation and periodic professional assessment.

    How far from a building should a French drain be installed?

    In most cases, a French drain should be positioned at least a meter away from older buildings to prevent potential structural issues.

    Are there regional considerations for French drain installation?

    Yes, in the UK, installation standards may vary depending on local soil conditions and building regulations.

    Can French drains be installed under driveways?

    Yes, French drains can be installed under driveways, though this requires more robust pipe materials and careful backfilling to support vehicle loads without compromising drainage function.

    Do French drains work in clay soil?

    French drains can work in clay soil, though they may require modifications such as increased aggregate depth or connection to alternative discharge methods since clay doesn’t absorb water readily.

    Will a French drain solve my basement flooding problem?

    French drains can be highly effective for basement water management when properly designed and installed. However, severe flooding issues might require additional waterproofing measures alongside drainage improvements.

    Should I hire a professional to install a French drain?

    Hiring an established company in the drainage industry ensures the system is designed and installed correctly, maximizing effectiveness and longevity.

    Are there regulations for French drain installation?

    Yes, you may need to coordinate with local authorities to ensure compliance with relevant regulations, especially when connecting to public sewers or working near property boundaries.


    Transform your property with professional drainage solutions

    French drains represent one of the most effective, long-lasting solutions for property drainage challenges. Whether you’re dealing with foundation water issues, garden flooding, or surface water management problems, these systems offer reliable, low-maintenance performance that protects your investment and enhances your property’s usability.

    At BDS Drainage, we’ve helped hundreds of property owners across London and the South East solve their drainage problems with expertly designed and installed French drain systems. Our team combines decades of experience with the latest materials and techniques to deliver solutions that work reliably for years to come.

    Don’t let water damage threaten your property or limit your enjoyment of outdoor spaces. Contact our drainage experts today for a free consultation and quote. We’ll assess your specific situation, explain your options, and design a French drain system that meets your needs and budget.

    Call us to schedule your free assessment—your property deserves professional drainage solutions that work.